
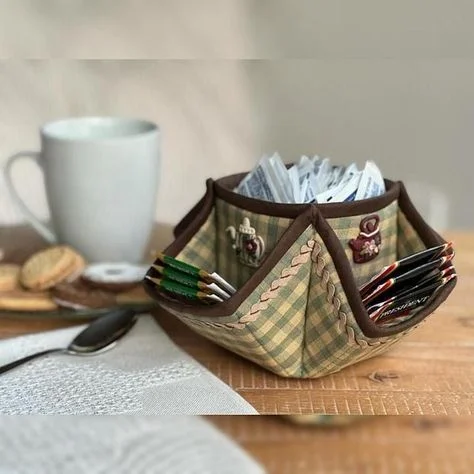
Are you looking for a fun and functional quilting project that puts your scraps and creativity to good use? An Organizer Basket is the perfect answer. Whether you’re tidying up your sewing room or looking for a handmade gift idea, this tutorial will walk you through how to make a quilted organizer basket from start to finish.
In this step-by-step guide, we’ll show you how to use your favorite quilt pattern to create a sturdy and stylish basket. It’s a fantastic way to combine your love of quilt work with practical, everyday items.
Why Make a Quilted Organizer Basket?
A quilted organizer basket is not just beautiful — it’s incredibly useful. You can use it to store sewing supplies, kids’ toys, toiletries, remote controls, or anything that tends to clutter your home. Plus, it brings a cozy, handmade touch to your decor.
When you choose a beautiful quilt pattern, you’re adding a personal element to a utilitarian item. That’s what makes this project so satisfying — it’s both creative and useful. Whether you’re a seasoned quilter or just starting out, this project is simple enough for beginners and fun for experienced makers.
Another great reason to make a quilted organizer basket is that it’s an excellent scrap-busting project. You can use leftover fabric and batting from previous projects. That means less waste and more charm in your finished product.
Materials Needed for Your Organizer Basket
Before starting your project, make sure you have all the necessary materials. You don’t need much, and many of these items are likely already in your quilting stash. Here’s what you’ll need:
- Fabric for the exterior (1 fat quarter or equivalent)
- Fabric for the lining (1 fat quarter)
- Coordinating fabric for handles (optional)
- Batting or fusible fleece (roughly 18” x 22”)
- Thread to match or contrast
- Quilting ruler, rotary cutter, and mat
- Iron and pins or clips
- Sewing machine
Choose your quilt fabric with care. If you’re using a complex quilt pattern, be sure the design will still be visible when the fabric is cut and sewn into a three-dimensional shape. Simpler patterns or smaller prints often work best.
Don’t forget the batting! Fusible fleece or quilt batting helps give the basket structure and that soft, quilted look we all love. If you prefer a firm basket, you can add interfacing or even stiffen the sides with foam stabilizer.
Step 1: Cut Your Fabric
To begin your quilt basket, cut your fabric pieces. You’ll need the following measurements, which can be adjusted depending on how large you want your basket to be:
- Exterior: (2) rectangles 10” x 8”
- Lining: (2) rectangles 10” x 8”
- Batting: (2) rectangles 10” x 8”
- Bottom: (1) rectangle 10” x 6” for both lining and exterior
- Handles: (2) strips 8” x 2”
Layer your exterior pieces with the batting and quilt as desired. You can follow a basic quilt pattern with diagonal lines, cross-hatch, or echo quilting. This is your chance to be creative and give your basket a unique look.
After quilting the exterior panels, press them flat and trim them to ensure they’re uniform in size. This step is key for getting a clean, professional finish when assembling the basket.
Step 2: Assemble the Outer Shell
Now it’s time to build the outside of your organizer basket. Take the two quilted exterior panels and the bottom piece. With right sides together, sew the panels to the long sides of the bottom piece using a ¼” seam allowance.
Then, sew the short sides of the panels together, forming a rectangle. Pinch the corners so that the side seams line up with the bottom edge, then sew across to form boxed corners — this is what gives the basket its depth and structure.
Repeat this process with the lining pieces (without batting), but leave a 3” gap in one of the bottom seams. You’ll use this gap to turn your basket right-side out at the end of the process.
Step 3: Prepare and Attach the Handles
The handles are optional but add both style and convenience. Take your handle strips, fold them lengthwise with wrong sides together, and press. Open them up, fold each side toward the center crease, press again, then fold in half and topstitch along both edges.
Pin one handle on each side of the basket, aligning the raw edges with the top edge of the exterior basket. Space the ends about 2–3 inches apart for best results. Baste the handles in place using a 1/8” seam allowance.
Handles can be made from contrasting fabric, faux leather, or even webbing, depending on the look you want. They add a polished, store-bought feel to your handmade quilt project.
Step 4: Assemble the Basket
With your lining and exterior baskets completed, it’s time to bring them together. Place the exterior basket inside the lining with right sides facing. Make sure the handles are tucked down between the layers. Align the side seams and top edges, and clip in place.
Sew all the way around the top edge with a ½” seam allowance. Then turn the entire basket right-side out through the gap in the lining. Push out the corners, smooth the sides, and press everything flat.
Finally, sew the gap in the lining closed using a small ladder stitch or by topstitching close to the edge. Then topstitch around the top edge of the basket for a crisp, finished look.
Optional: Add Quilted Embellishments
If you want to take your organizer basket to the next level, consider embellishing it with extra quilt pattern elements. You could piece together a small quilt block for the front panel or even add applique shapes to match your home decor.
Another fun option is to label your baskets using embroidered tags or quilted fabric labels. This is especially helpful if you’re organizing things like fabric scraps, craft tools, or pantry items.
Adding embellishments personalizes your project and showcases your quilt skills. It also makes your basket a thoughtful handmade gift for birthdays, baby showers, or holidays.
Care Tips for Your Organizer Basket
Your finished basket is both durable and easy to clean. Because it’s made with quilting cotton and batting, you can usually toss it in the washing machine on a gentle cycle, then reshape and air dry.
If you’ve used special materials like leather handles or heavy stabilizer, spot cleaning is best. Regular pressing will keep your basket crisp and beautiful.
Organizer baskets made with your favorite quilt pattern will hold up well over time. The more you make, the easier and faster the process becomes — and soon you’ll want one in every room!
Final Thoughts: Start Quilting Your Own Organizer Basket Today
Creating a quilted organizer basket is a simple, satisfying project that’s perfect for using up scraps, exploring new quilt patterns, and adding handmade charm to your space. It’s a great way to get creative while producing something that’s both beautiful and functional.
With just a few pieces of fabric, some batting, and your sewing machine, you’ll have a stunning quilted basket in just a couple of hours. Follow this tutorial, experiment with colors and patterns, and make it your own.
Don’t forget to share your finished organizer basket on social media or with your quilting group — and tag your photos with #quiltpattern and #organizerbasket to inspire others in the community!