
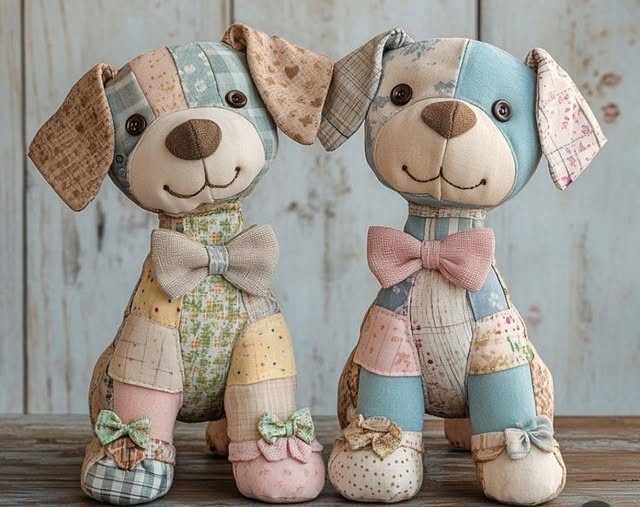
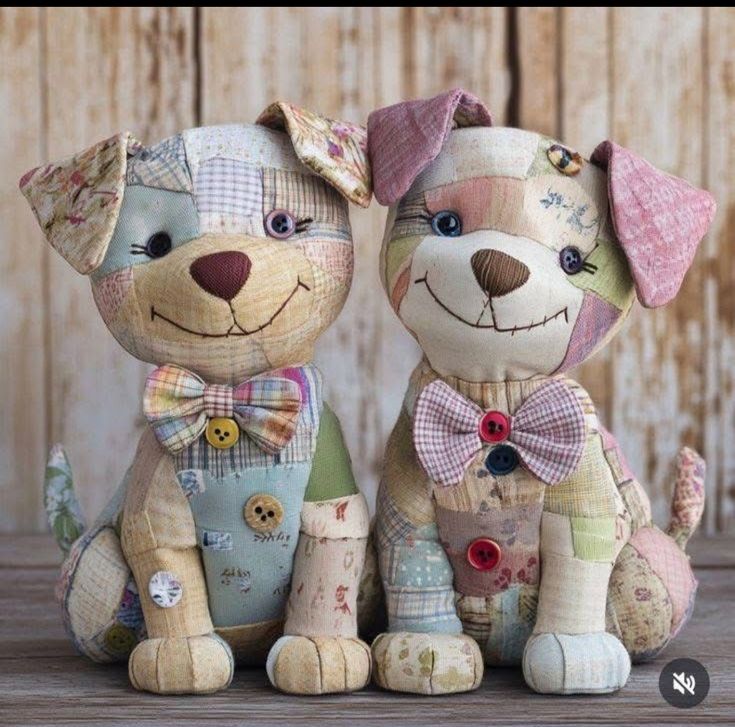
Creating a patchwork dog is a joyful and fulfilling quilting project that combines creativity, functionality, and fun. Whether you’re making a soft toy for a child, a decorative piece for a room, or a heartfelt handmade gift, this tutorial will guide you through every step of bringing your quilted pup to life.
In this quilt tutorial, we’ll walk you through how to cut, piece, and sew your own adorable dog using a variety of colorful fabrics. This free quilt pattern is perfect for using up scraps and exploring vibrant combinations. Let’s begin!
Materials Needed
Before you start, make sure you have the following materials ready:
- Fabric scraps in assorted prints (cotton preferred)
- Batting or soft stuffing
- Sewing machine or needle and thread (for hand-sewing options)
- Scissors or rotary cutter
- Quilting ruler and mat
- Iron and ironing board
- Thread in coordinating colors
- Safety pins or quilting clips
- Embroidery thread or buttons for eyes (optional)
Tip: Mix and match prints, florals, plaids, and solids to give your patchwork dog a unique personality.
Choosing the Right Fabrics
Let Personality Shine Through
Your fabric choices play a huge role in the final look of your patchwork dog. Think about the color palette you want: pastel for a baby gift, bright for a playroom, or neutrals for a farmhouse style.
Scraps from previous quilt patterns work wonderfully here. This is a great opportunity to use up your stash of leftover fabrics from older projects.
Don’t forget texture! Lightweight cotton works best, but mixing in flannels or corduroy can add a tactile element to your finished dog.
Cutting the Pattern Pieces
Planning for Precision
Begin by sketching or printing out a simple dog silhouette. Separate the body into parts you’ll patch: head, ears, legs, and torso. These will be your fabric “zones.”
Use a rotary cutter and ruler to cut small squares or rectangles for each section. Sizes can vary, but 2.5” x 2.5” squares are common for patchwork.
Remember to include seam allowances (1/4″) as you cut. Lay out the pieces on a table or design wall before sewing to visualize the pattern.
Assembling the Patchwork Panels
Sew with Love
Arrange and sew your squares together to form rectangles or shapes that match the dog pattern zones. Press each seam flat to reduce bulk and ensure accuracy.
Use a consistent seam allowance throughout the project. This step is key to keeping your quilt precise and proportional.
Once all patchwork sections are created, lay them out and double-check placement. Now your dog is really starting to take shape!
Constructing the Patchwork Dog
It All Comes Together
Pin or clip the patchwork panels together, right sides facing. Begin sewing the body pieces, then attach ears, legs, and tail. Leave a small opening for turning.
After sewing, carefully clip curves and corners to reduce bulk. Turn the dog right side out and gently shape with your fingers.
Stuff with batting or soft toy filling, then hand-stitch the opening closed. Add any embellishments like eyes, nose, or even a little scarf!
Finishing Touches
Customize with Personality
You can personalize your patchwork dog in countless ways. Embroider a name, sew on patches, or add a squeaker for younger kids.
Try mixing fabric types to add more texture. Chenille ears or a flannel belly can bring more character.
Don’t forget: “Perfeito para adicionar um toque floral ao seu próximo projeto!” Use floral scraps for a truly charming touch.
Tips for a Professional Finish
Little Details Matter
- Press Often: Iron seams after each section to keep everything neat.
- Block Your Panels: Gently steam or press your finished patchwork panels to ensure even sizes before final assembly.
- Test Your Stitches: Especially if hand-sewing, use a strong, small stitch to keep stuffing inside.
These tips will make your free quilt pattern project look neat and last longer.
Variations on the Patchwork Dog Pattern
Let Creativity Run Wild
Try different dog shapes—long-bodied like a dachshund or fluffy and round like a poodle. Adjust your silhouette to reflect a favorite breed!
Create a mini version as a keychain or ornament, or go large for a huggable cushion-sized pet.
Don’t forget to experiment with different color combos. “Não esqueça de experimentar combinações de cores diferentes.”
Sharing Your Quilt Tutorial Journey
Join the Community
After completing your quilt tutorial, share photos online to inspire others. Facebook groups and Pinterest boards are great places to showcase your quilt patterns.
Encourage your quilting friends to make their own versions. Swap scraps and ideas to make your next dog even more creative.
Celebrate each finish and keep the momentum going.
Explore More Quilt Patterns
Keep Stitching Joyfully
Once you’ve mastered this patchwork pup, try exploring more free quilt patterns that challenge your creativity.
Consider matching accessories: a dog-shaped pillow, quilt block with dog motifs, or even a dog-themed baby quilt.
Stay inspired, keep quilting, and remember: every stitch tells a story. Happy quilting!