
Crochet has always been a creative way to blend style and function, and ear warmers are one of the most practical accessories you can make. Unlike bulky hats, they are lightweight, easy to carry, and perfect for keeping your ears cozy on a chilly day. The Phoenix Crochet Ear Warmer is not only comfortable but also carries a beautiful, fiery texture that stands out. With a simple crochet pattern, you can create this accessory even if you are just starting your journey into the crochet world.
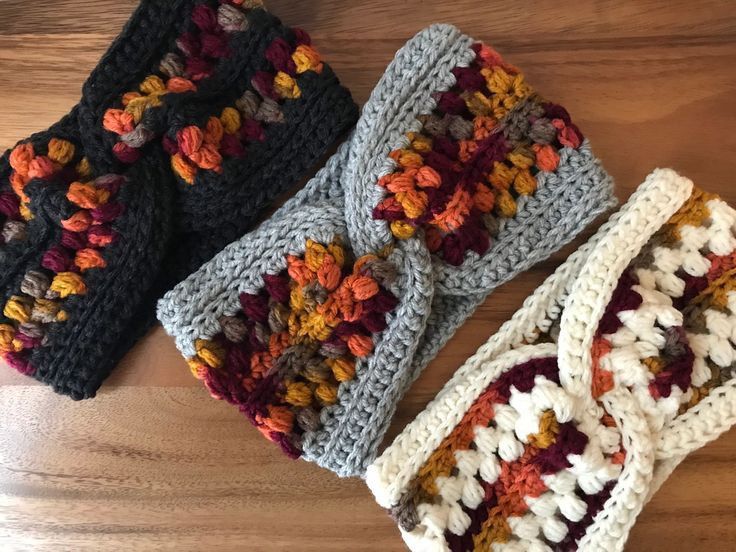
What makes the Phoenix design special is its balance between elegance and warmth. The pattern is designed to give a snug but flexible fit, making it suitable for different head sizes. By using bold yarn colors, you can create an ear warmer that mirrors the rising flames of a phoenix, or keep it neutral for a more classic look. Either way, it’s a versatile piece that you’ll be proud to wear or gift.
This tutorial is designed with beginners in mind, but it’s also enjoyable for experienced crocheters looking for a relaxing and stylish project. By following the steps carefully, you’ll end up with a finished piece that not only looks beautiful but also showcases your dedication and creativity. Let’s start by preparing the materials you’ll need.
Materials You’ll Need
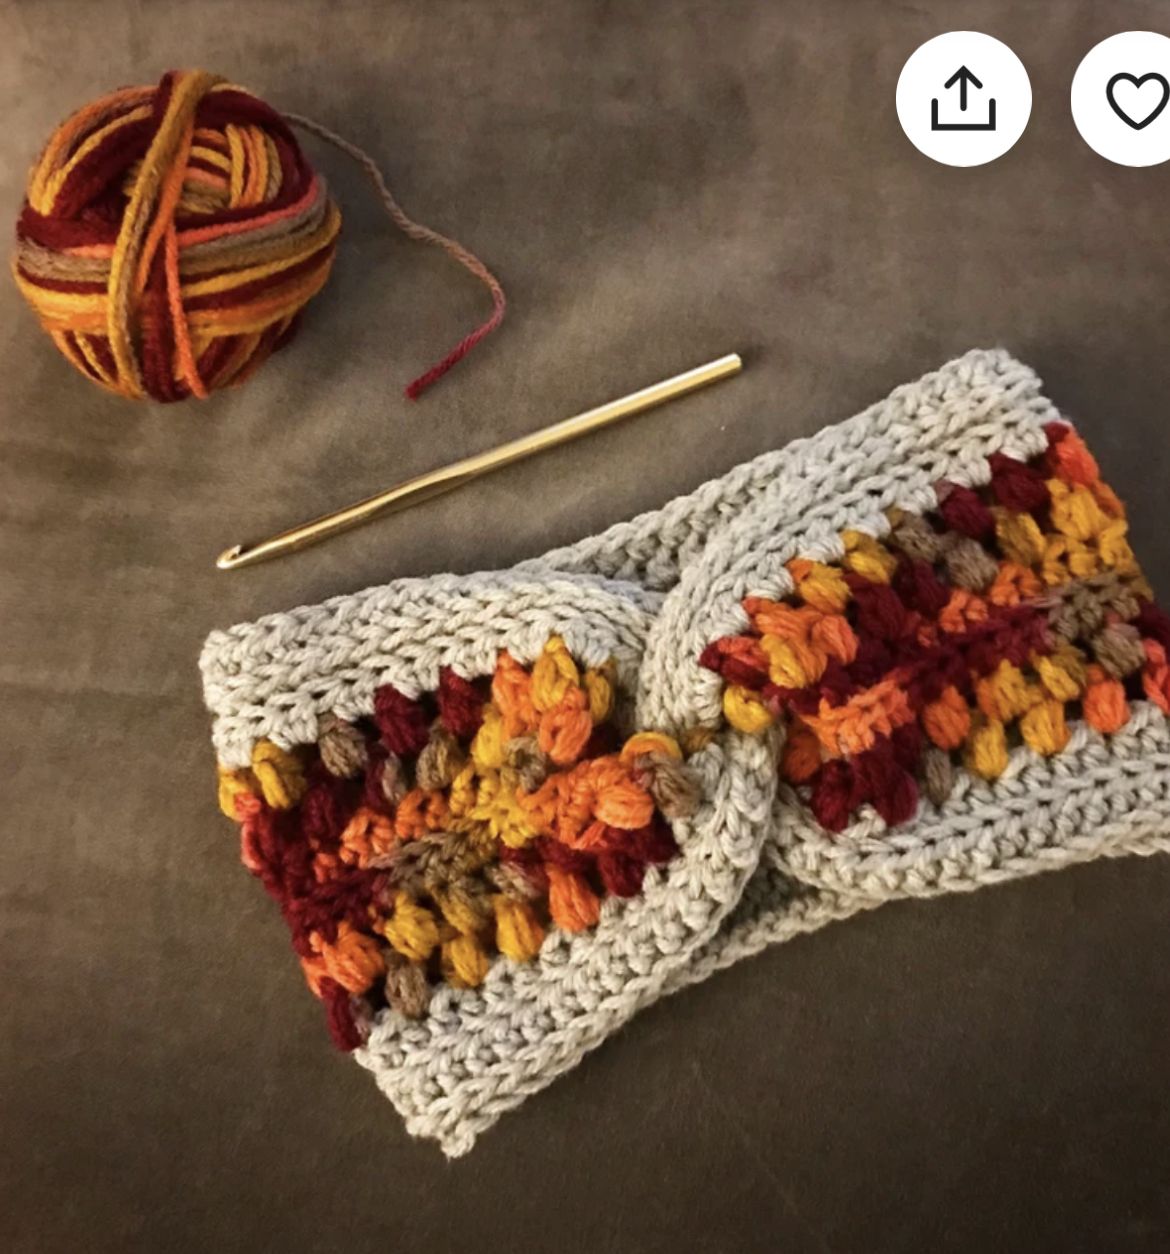
Before beginning any crochet project, gathering your supplies ensures a smooth and enjoyable crafting process. For the Phoenix Crochet Ear Warmer, you’ll need a few basic items that are easy to find at any craft store or online. Most of these materials are standard for crochet projects, making them perfect for beginners.
Here’s the list:
- Medium weight yarn (Category 4) – choose fiery shades like red, orange, or gold for a phoenix-inspired look
- Crochet hook size H/5.0 mm or I/5.5 mm, depending on your tension
- Scissors for trimming yarn
- Tapestry needle for weaving in ends
- Measuring tape to check the length of your ear warmer
When choosing your yarn, opt for something soft but durable. Acrylic yarn is affordable and easy to care for, while wool blends provide extra warmth during colder months. The color palette is where you can get creative—go bold with flame-inspired hues or choose calming pastels if you want something more subtle.
Lastly, make sure your crochet hook matches the yarn weight for best results. A hook that is too small will make your stitches tight and stiff, while one that is too large may create loose gaps. With your tools ready, it’s time to move into the exciting part: the step-by-step crochet pattern.
Step-by-Step Phoenix Crochet Ear Warmer Pattern
This crochet pattern is straightforward, making it perfect for beginners while still offering a beautiful texture that advanced crocheters will enjoy. Follow these steps carefully, and soon you’ll have your own Phoenix Ear Warmer ready to wear.
Step 1: Foundation Chain
Start by chaining 70–80 stitches, depending on the size of your head. This chain will determine the circumference of your ear warmer. Join the chain with a slip stitch to form a loop, making sure not to twist it.
Step 2: First Round
Chain 2, then work double crochet stitches (dc) around the loop. Join with a slip stitch at the end of the round. This creates the base layer of your ear warmer.
Step 3: Textured Rounds
For the Phoenix-inspired texture, alternate between front post double crochet (fpdc) and back post double crochet (bpdc). This creates a raised, ribbed effect that resembles flames rising. Continue this pattern for 6–8 rounds or until the ear warmer is the width you prefer.
Once you reach the desired width, fasten off and weave in the yarn ends using your tapestry needle. The result will be a cozy, textured band that hugs your ears perfectly. This simple yet striking stitch combination is what gives the Phoenix Ear Warmer its signature look.
Customization Ideas
One of the joys of working with any crochet pattern is the ability to personalize it. The Phoenix Crochet Ear Warmer can be customized in endless ways, depending on your style preferences and yarn choices. With just a few tweaks, you can transform this simple accessory into something truly unique.
For example, consider playing with color combinations. You could create a gradient by using variegated yarn that naturally shifts between fiery shades, or use two contrasting yarns to create bold stripes. Adding a decorative edge with a scalloped or picot border can also elevate the look, giving your ear warmer an elegant finish.
Another way to personalize your project is by adding embellishments. Small crochet flowers, buttons, or even a sewn-on patch can give your ear warmer extra personality. These little touches not only enhance the design but also make your handmade accessory feel even more special.
Tips for Beginners
If you are new to crochet, don’t worry—this project is designed with simplicity in mind. The stitches involved are basic and commonly used, but they produce a surprisingly intricate-looking result. With a little patience and practice, even beginners can achieve beautiful results.
One helpful tip is to keep your tension consistent throughout the project. Uneven tension can lead to a wavy or loose ear warmer that doesn’t fit properly. If you notice your stitches are too tight, try using a larger hook; if they’re too loose, switch to a smaller one. Checking your gauge at the beginning can save you time later.
Another beginner-friendly approach is to practice the front and back post stitches on a small swatch before starting your actual project. This allows you to get comfortable with the technique without worrying about mistakes on the final piece. Remember, crochet is about enjoying the process as much as the finished product, so don’t rush yourself.
Styling Your Phoenix Crochet Ear Warmer
Once your ear warmer is complete, the fun part is styling it with your everyday outfits. The Phoenix Crochet Ear Warmer is both functional and fashionable, making it a versatile accessory for different occasions. Whether you’re going for a casual walk, attending a winter event, or simply staying cozy at home, this piece has you covered.
Pair it with a matching scarf or gloves for a coordinated set. You could even make multiple ear warmers in different colors to match various outfits. Since the pattern works up quickly, it’s also an excellent option for last-minute handmade gifts during the holidays.
Ear warmers are also a great alternative to hats for those who don’t like covering their entire head. They keep your ears warm while letting your hair breathe, which is especially handy if you want to avoid “hat hair.” With a little creativity, you can make your Phoenix Ear Warmer both stylish and practical.
Final Thoughts and Invitation to Share
The Phoenix Crochet Ear Warmer is a delightful project that blends functionality with artistic expression. With just a few simple stitches, you can create a textured accessory that not only keeps you warm but also reflects your personal style. Whether you make it for yourself or as a thoughtful gift, this crochet pattern is sure to bring warmth and joy to its wearer.
Remember, crochet is as much about community as it is about creativity. Every ear warmer you make tells a small story—of your choice of colors, your patience, and your passion for handmade crafts. Sharing your work can inspire others to try their hand at crochet, creating a ripple effect of creativity.
PATTERN HERE
Crochet – Tutorial
FULL PATTERN ACCESS
You will be redirected to another site
If you decide to make the Phoenix Crochet Ear Warmer, I’d love to see your results! Share your project with fellow crafters online or in your crochet groups, and spread the joy of handmade accessories. Together, we can keep the art of crochet alive and thriving—one stitch at a time.