Creating a beautiful and functional quilt project doesn’t have to be complicated. In this tutorial, you’ll learn how to make a charming quilt block box pattern that is perfect for storing small items, gifting, or simply adding a handmade touch to your home décor. This project blends creativity and practicality, making it ideal for beginners who want to explore new Quilt techniques without feeling overwhelmed.
A quilt block box is essentially a fabric box constructed using quilted panels. Each side is made from a quilt block, giving you the opportunity to play with colors, patterns, and textures. It’s a wonderful way to use fabric scraps and practice your favorite quilt Pattern designs while creating something useful.
Throughout this tutorial, you’ll find a step-by-step guide, a list of materials, and creative ideas to personalize your project. Grab your fabrics, thread your sewing machine, and let’s dive into this fun and inspiring quilting journey.
Materials You Will Need
Before starting your quilt block box pattern, it’s important to gather all the necessary materials. Having everything ready will make the process smoother and more enjoyable. You don’t need expensive tools—just a few basic quilting supplies and your creativity.
You will need cotton fabric in different colors or prints for your quilt blocks, a coordinating fabric for the lining, and some interfacing or batting to give your box structure. Additionally, prepare a rotary cutter, cutting mat, quilting ruler, sewing machine, thread, pins or clips, and an iron for pressing your seams neatly.
If you want your box to stand firmly, consider using fusible fleece or foam stabilizer. These materials add sturdiness and help the box keep its shape. Beginners often find that using slightly thicker interfacing makes the assembly easier and the final result more satisfying.
Choosing Your Quilt Block Pattern
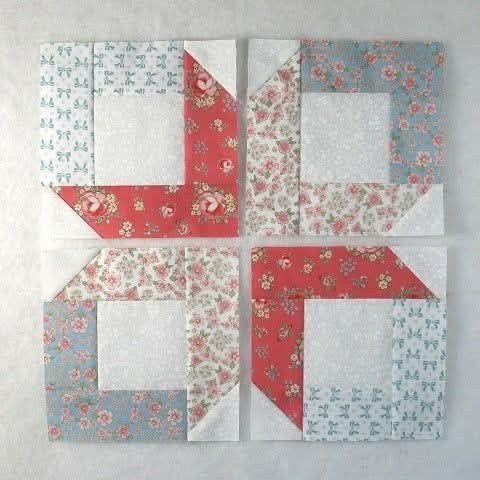
One of the most exciting parts of this project is selecting your quilt Pattern. Since each side of the box will feature a quilt block, you can keep things simple or experiment with more detailed designs depending on your skill level.
For beginners, classic blocks like the nine-patch, simple squares, or half-square triangles are perfect choices. These patterns are easy to assemble and provide a clean, balanced look. They also allow you to focus on learning construction techniques rather than getting lost in complex designs.
If you’re feeling adventurous, you can mix different blocks for each side of the box. This creates a unique and playful effect, turning your quilt block box into a true statement piece. Just make sure all blocks are the same size so the box assembles correctly.
Cutting and Preparing Your Fabric
Accurate cutting is essential for any Quilt project, especially when constructing something structured like a box. Start by deciding the finished size of your quilt blocks. A common beginner-friendly size is 6 to 8 inches per block.
Cut your fabric pieces according to your chosen quilt Pattern. Take your time with this step, using a ruler and rotary cutter to ensure clean, precise edges. Consistency in cutting will make sewing much easier and help your blocks align perfectly.
Once all pieces are cut, press your fabric to remove wrinkles. This step might seem small, but it makes a big difference in achieving professional-looking results. Smooth fabric is easier to sew and ensures your seams stay accurate.
Sewing the Quilt Blocks
Now comes the fun part—assembling your quilt blocks. Follow your selected quilt Pattern step by step, sewing pieces together with a consistent seam allowance, typically ¼ inch. This consistency is key to making sure all your blocks end up the same size.
After sewing each seam, press it flat with an iron. Pressing (not ironing back and forth) helps set the stitches and keeps your blocks crisp and neat. Many beginners skip this step, but it truly elevates the quality of your Quilt work.
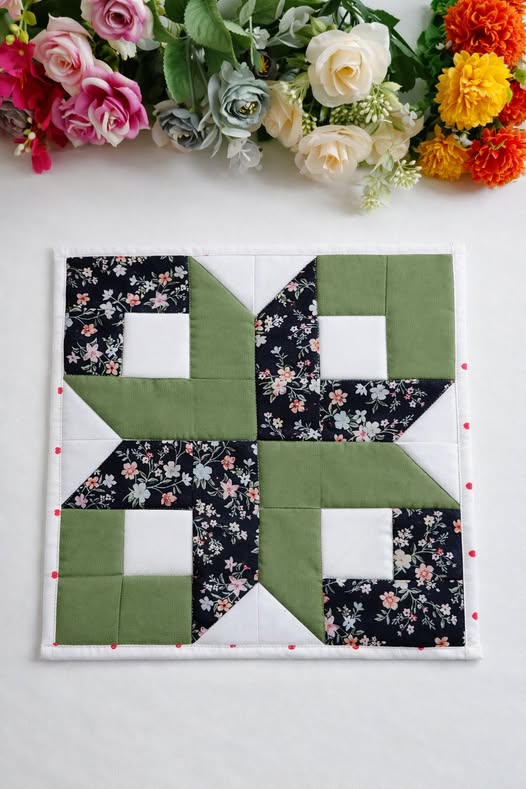
Continue assembling until you have five quilt blocks—four for the sides and one for the base of your box. If you want a lid, you can make a sixth block. Lay them out to ensure they match in size and look visually balanced together.
Assembling the Box Structure
With your quilt blocks ready, it’s time to turn them into a box. First, attach interfacing or batting to the back of each block. This adds structure and gives your box that sturdy, three-dimensional form.
Start by sewing the side blocks together in a row, then connect the ends to form a loop. Next, attach the bottom block by sewing it to the lower edges of the side panels. Take your time aligning corners carefully to achieve clean edges.
Once the outer box is assembled, repeat the same steps with your lining fabric. Then, place the lining inside the outer box with wrong sides facing each other. Fold the top edges inward and stitch around the top to secure everything neatly.
Adding Finishing Touches
Finishing touches can take your quilt block box from simple to stunning. Consider adding a fabric binding around the top edge for a polished look. This also helps hide raw edges and strengthens the structure.
You can also sew small fabric handles on the sides for easy carrying. These can be made from leftover fabric strips and add both function and charm to your box. Decorative stitching or embroidery is another great way to personalize your project.
Don’t forget to give your finished box a final press. This helps set the seams and gives your project a crisp, professional appearance. Small details like this make a big difference in the final result.
Creative Personalization Ideas
One of the best things about this Quilt project is how customizable it is. You can adapt the quilt Pattern, colors, and size to suit your style or the purpose of the box. This makes it a perfect project for gifts or home organization.
Try using themed fabrics for special occasions, like floral prints for spring or festive colors for holidays. You can also incorporate scraps from previous Quilt projects to create a memory box filled with personal meaning.
Another idea is to experiment with patchwork styles or add appliqué designs to your quilt blocks. Even beginners can try simple shapes like hearts or stars to give their box a unique and creative touch.
Tips for Beginners
If you’re new to quilting, don’t worry—this project is very beginner-friendly. Start with simple quilt Pattern designs and focus on learning basic techniques like accurate cutting and consistent seam allowances.
Take your time with each step and don’t rush the process. Quilting is meant to be relaxing and enjoyable. Mistakes are part of learning, and each project helps you improve your skills.
Most importantly, have fun with your Quilt creation. Choose fabrics that make you happy and enjoy the process of turning them into something beautiful and useful. Confidence comes with practice, so keep creating.
Share Your Quilt Creation
Now that you’ve completed your quilt block box pattern, it’s time to show off your work. Handmade projects are meant to be shared, and your creation could inspire others to start their own quilting journey.
Take photos of your finished box and share them on social media, in quilting groups, or with friends and family. You never know who might fall in love with your design and want to try the same quilt Pattern.
If you enjoyed this project, consider making more boxes in different sizes or styles. The possibilities are endless, and each new Quilt project is another opportunity to express your creativity. Happy quilting!