
If you are looking for a meaningful sewing project that combines comfort, creativity, and purpose, the Quilted Hug Shawl is a perfect choice. This beautiful wrap is designed not only to keep someone warm but also to provide a sense of care and comfort—like a hug you can wear.
In this complete tutorial, you will learn everything you need to create your own Quilted Hug Shawl from scratch. Whether you are a beginner or an experienced quilter, this guide will walk you through the materials, planning, cutting, sewing, and finishing steps in a simple and accessible way.
Materials You Will Need
Before starting your project, it is important to gather all the necessary materials. Having everything ready will make the process smoother and more enjoyable.
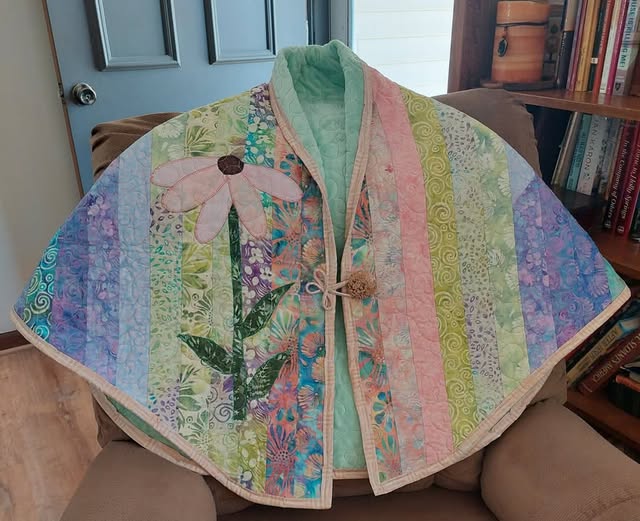
You will need one strip of fabric measuring 6½ inches by 66½ inches. In addition, you will need thirteen strips measuring 2½ inches by 66½ inches. These strips will form the main design of your quilted shawl, so feel free to mix colors and patterns that complement each other.
For the backing, you will need approximately two yards of polar fleece. This material adds warmth and softness, making the shawl cozy and comfortable to wear. Keep in mind that fleece should not be ironed, as heat can damage the fabric.
You will also need around 14 feet of binding to finish the edges. You can either purchase ready-made binding or create your own using coordinating fabric.
Other essential tools include a sewing machine, matching thread, rotary cutter, quilting ruler, cutting mat, pins or clips, scissors, and an iron (for cotton fabrics only).
Planning Your Design
One of the most enjoyable parts of this project is designing your shawl. Before sewing, take time to lay out your fabric strips and experiment with different arrangements.
You can create a gradient effect by arranging colors from light to dark, or you can go for a scrappy look by mixing various prints randomly. Coordinated color palettes, such as pastels or seasonal tones, also work beautifully.
It is important to think about how the shawl will look once it is folded and worn. The ends will be visible, so try to balance the colors and patterns for a pleasing final appearance.
Planning ahead helps avoid mistakes and ensures that your finished shawl looks exactly how you imagined.
Sewing the Quilt Top
Once your design is finalized, begin sewing the strips together. Place two strips with right sides facing each other and sew along the long edge using a ¼-inch seam allowance.
Continue adding strips one by one, pressing the seams flat as you go. Pressing helps keep the fabric smooth and makes the final piece easier to work with.
Repeat this process until all strips are joined into a single panel. At this stage, your quilt top should measure approximately 66½ inches wide.
Take your time during this step to ensure straight seams and proper alignment. Accuracy here will make the rest of the project much easier.
Folding and Cutting the Shawl Shape
After completing the quilt top, the next step is to shape it into the shawl form. This is done by folding and trimming the fabric.
Fold the panel carefully to create a symmetrical shape. The goal is to form a triangular or tapered wrap that sits comfortably on the shoulders.
For a standard size, the finished dimensions should be approximately 66½ inches across the top, 32½ inches in height, and 14½ inches across the bottom. Adjustments can be made for different sizes, such as extra small or plus size.
Once the fabric is folded correctly, trim the edges to match the desired shape. Save any leftover fabric for future projects or decorative details.
Adding the Fleece Backing
The fleece backing is what gives the Quilted Hug Shawl its signature warmth and softness. Begin by laying the fleece on a large, flat surface.
Place the quilt top on top of the fleece with the right side facing up. Smooth out any wrinkles and ensure both layers are aligned properly.
Secure the layers together using pins or clips. This step is important to prevent shifting during quilting.
Trim the fleece to match the exact shape of the quilt top. At this point, your shawl will start to take its final form.
Quilting the Layers Together
Quilting holds the layers together and adds texture to the shawl. To begin, roll the fabric if necessary so it fits comfortably under your sewing machine.
Start stitching from the fleece side, following the seam lines of the quilt top. This technique, often called “stitch in the ditch,” creates a clean and subtle look.
You can also add extra quilting lines for more detail and durability. Straight lines are ideal for beginners, but more advanced patterns can be used if desired.
Make sure to quilt evenly across the entire piece to keep the layers secure and prevent bunching.
Creating and Attaching the Pockets
Pockets are a practical and cozy addition to the shawl. They provide a place to warm your hands and add extra comfort.
To make the pockets, cut a 12-inch strip of fleece and divide it in half. Fold each piece into a pocket shape, typically triangular or slightly curved.
Add binding to one edge of each pocket for a clean finish. Then, position the pockets on the shawl approximately 6 to 8 inches above the bottom edge.
Pin the pockets in place and sew them securely onto the shawl. Repeat this process on both sides, ensuring they are symmetrical.
Finishing with Binding
Binding gives the shawl a polished and professional finish. Begin by attaching the binding to the front side of the shawl, sewing along the outer edge.
Once attached, fold the binding over to the fleece side and stitch it down neatly. Take your time around corners to ensure a smooth and even finish.
This step not only enhances the appearance of the shawl but also strengthens the edges and increases durability.
Adding the Closure Tab
The closure tab allows the shawl to stay securely in place when worn. To create it, cut two pieces of fabric measuring 3 by 8 inches.
Place the pieces right sides together and sew around the edges, leaving a small opening. Turn the fabric inside out and press it flat.
Close the opening with a small stitch, then attach the tab to the shawl. One side can include a loop, while the other can have a button or toggle.
Position the closure just above the pocket area for easy use and a comfortable fit.
Customization Ideas
One of the best things about the Quilted Hug Shawl is how customizable it is. You can personalize your project in many creative ways.
Consider adding appliqué designs such as flowers, hearts, or seasonal motifs. Embroidery is another great option for adding names or meaningful messages.
You can also experiment with different quilting patterns or use themed fabrics for holidays and special occasions.
Every shawl you make can be unique, reflecting your personal style and creativity.
Final Thoughts
The Quilted Hug Shawl is more than just a sewing project—it is a thoughtful and meaningful creation that can bring comfort to someone in need.
With simple materials and basic quilting techniques, you can create a beautiful and functional piece that feels like a warm embrace. This project is perfect for gifting, donating, or simply enjoying yourself.
Now that you have learned the complete process, it is time to start your own shawl. Take your time, enjoy each step, and most importantly, have fun creating something special.
When you finish your project, consider sharing it with others. Your work might inspire someone else to start their own Quilted Hug Shawl journey.
