
If you’re a quilting enthusiast looking to protect your sewing machine in style, a quilted sewing machine cover is the perfect project. Not only does it keep your machine dust-free, but it also adds a charming touch to your craft room. This quilt tutorial will guide you through the process from fabric cutting to finishing.
We’ll use easy-to-follow quilt patterns to help you sew a custom-sized cover for your machine. This tutorial is beginner-friendly and requires only basic sewing and quilting skills. Whether you’re new to quilting or a seasoned pro, this project will be a functional and fun addition to your sewing journey.
In this blog post, you’ll learn how to make a quilted sewing machine cover, complete with detailed fabric measurements, cutting instructions, and sewing steps. Let’s get started and give your sewing machine the beautiful, quilted home it deserves!
Materials You’ll Need for the Quilted Cover
Before beginning any quilt project, it’s essential to gather the right materials. For this sewing machine cover, you’ll need cotton fabric for the outer quilt, lining fabric, and batting. Use coordinating fabrics or dig into your stash of leftover quilt fabrics!
Here’s your basic materials list:
- Outer fabric (quilting cotton): 1 yard
- Lining fabric: 1 yard
- Batting: 1 yard (cotton or polyester)
- Bias tape: 2.5 yards
- Thread, sewing machine, and basic quilting tools (ruler, rotary cutter, pins)
Choosing high-quality quilting cotton is key for durability and a polished finish. Consider using pre-washed fabric to avoid shrinking after the cover is finished. You can also personalize your project with appliqué, embroidery, or pieced quilt patterns.
Measuring Your Sewing Machine
To make a perfect fit, start by measuring your sewing machine. Measure the width (side to side), height (top to bottom), and depth (front to back). Write down these numbers, and then add 1 inch to each dimension for seam allowances and ease.
Example measurements for a standard machine:
- Width: 17″ + 1″ = 18″
- Height: 12″ + 1″ = 13″
- Depth: 8″ + 1″ = 9″
These measurements will be used to cut your fabric into the right shapes. Always double-check your machine’s dimensions. If your machine is larger or smaller than average, adjust the measurements accordingly before cutting your quilt fabrics.
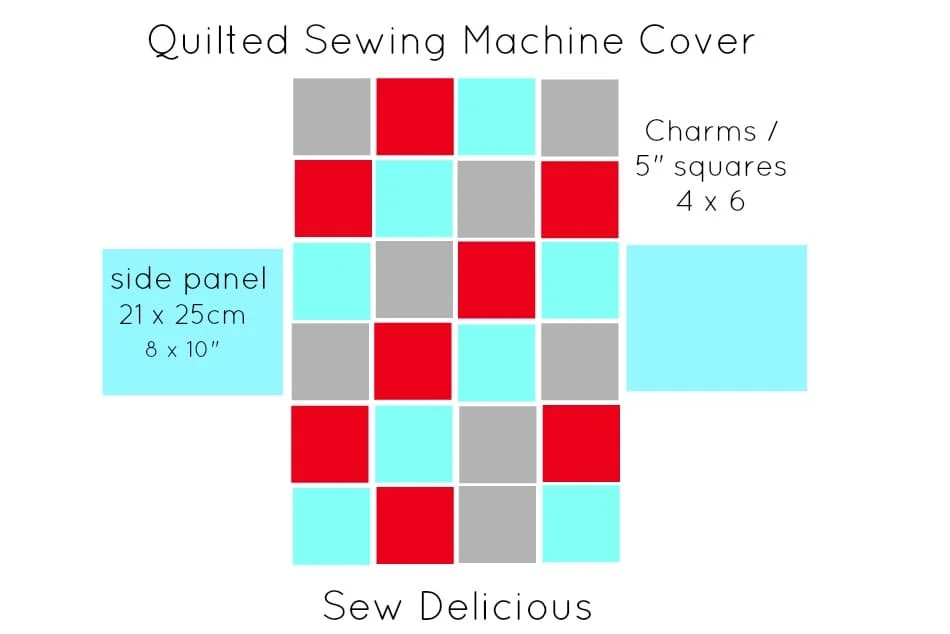
Cutting the Fabric Pieces – Quilt Layout
Using your measurements, cut the following pieces from your outer fabric, lining, and batting:
- Front and back panels: 2 pieces – 13″ high x 18″ wide
- Side panels: 2 pieces – 13″ high x 9″ wide
- Top panel: 1 piece – 9″ wide x 18″ long
Cut each piece from your quilt top fabric, lining, and batting. You’ll have three layers for each panel: outer fabric, batting in the middle, and lining inside. This quilt sandwich gives your cover the padded, structured look.
Use a rotary cutter for clean edges, and make sure all pieces are even. You can also use quilt basting spray or pins to hold your quilt layers together before sewing.

Quilting the Fabric Panels
Once your panels are cut, it’s time to quilt them. This part is where creativity comes in—use simple straight lines or follow your favorite quilt patterns to add visual interest. The quilted texture also strengthens the fabric and keeps the batting in place.
Place each quilt sandwich on your sewing surface and use a walking foot to sew straight lines 1″ apart across the panel. Start from the center and work outward to prevent fabric bunching. You can quilt in a grid, diagonals, or even in a meandering free-motion style if you’re experienced.
Repeat this process for all five panels (front, back, top, and two sides). Trim any excess batting or lining fabric after quilting. Your panels are now quilted and ready for assembly!
Assembling the Quilted Sewing Machine Cover
With all panels quilted, start by sewing the side panels to the front and back panels. Place the pieces right sides together and sew along the side edges using a ½” seam allowance. Press the seams open for a smooth finish.
Next, sew the top panel to the assembled piece. Align the long edges and pin them in place before stitching. Sew slowly around the corners for a clean curve. You now have a complete quilted box shape!
Try the cover on your machine to ensure a snug fit. If needed, you can make minor adjustments to the seams or trim the excess fabric before finishing.
Binding the Raw Edges with Bias Tape
To give your quilted cover a professional look, bind the raw edges inside using bias tape. This prevents fraying and adds a decorative touch. You can use store-bought or homemade bias tape in a coordinating fabric.
Pin the bias tape around the inside seams where all panels connect. Use a zig-zag or straight stitch to secure it. This step not only adds durability but also improves the overall aesthetic of your quilt project.
You can also use bias tape to hem the bottom edge of the cover for a polished look. Fold the tape over the edge and stitch all the way around the base of the cover.
Optional Additions – Personalize Your Quilt
Once your basic quilted sewing machine cover is complete, it’s time to add fun personal touches. Consider sewing on pockets for accessories, or add a handle to make moving your machine easier.
You can also experiment with patchwork quilt patterns for the outer panels. Try log cabin blocks, star blocks, or scrappy strips for a colorful and unique design. These details make your project one-of-a-kind and showcase your quilting skills.
Adding appliqué or embroidery with your initials is another way to customize your cover. These extra touches make your sewing space feel more personal and inspiring.
Tips for Success and Variations
When making your quilted cover, be sure to use pins generously and press seams as you go. A walking foot helps manage the thickness of quilt layers and prevents shifting. Take your time with measurements to ensure a neat, tailored fit.
If you’re feeling adventurous, try adapting this tutorial into a reversible cover. Use different fabrics on each side and bind the bottom edge with coordinating bias tape. That way, you can flip your cover for a new look whenever you want.
Also consider creating matching accessories, such as a thread catcher, pin cushion, or mat with pockets, using the same quilted fabric. These small items make great gifts and help use up leftover quilt scraps.
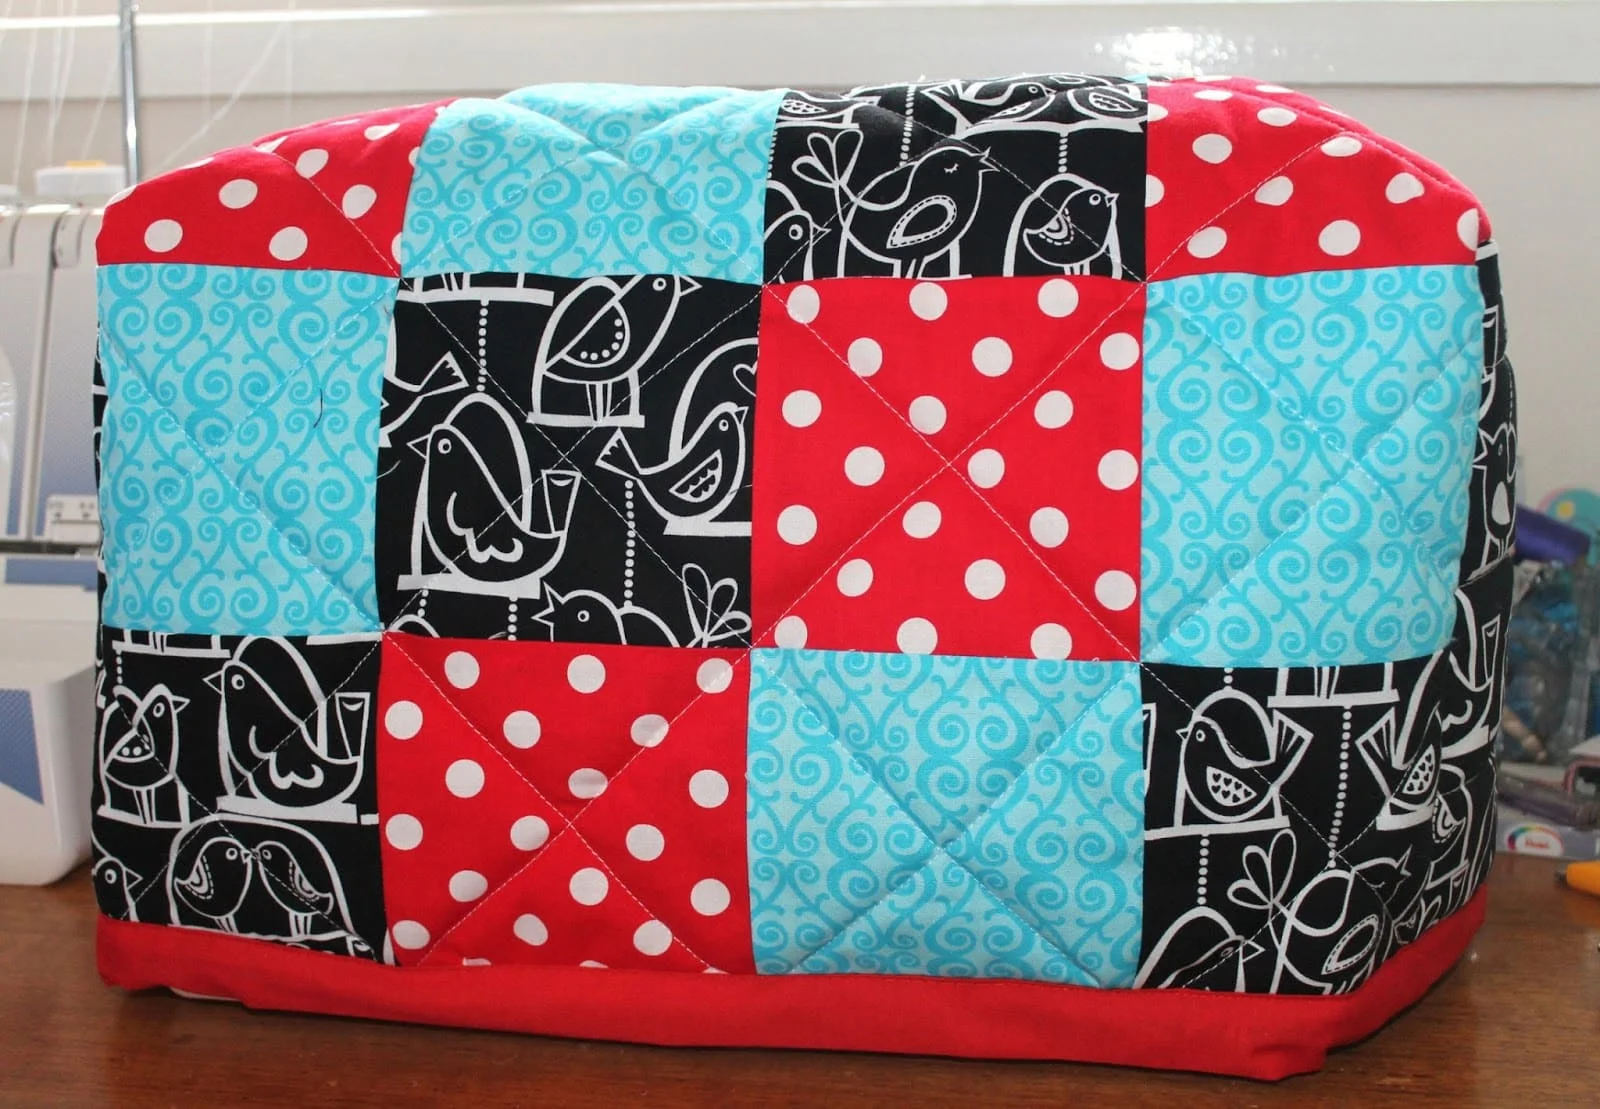
Final Thoughts on Your Quilted Sewing Machine Cover
Congratulations! You’ve now completed a fully functional and stylish quilted sewing machine cover. This project not only protects your machine but also lets you practice essential quilting techniques such as measuring, layering, and stitching.
By using different quilt patterns, you can make multiple covers to suit each season or mood. Plus, this type of project makes an excellent handmade gift for fellow quilters or sewing lovers in your life.
Whether you’re quilting for fun or function, every project builds your skill and confidence. Keep experimenting with new designs and patterns, and most importantly—enjoy the creative journey quilting offers!