
Looking for a sweet, simple, and beginner-friendly quilt project? The Quilted Teacup Pattern is the perfect blend of charm and creativity. Whether you’re a new quilter or someone who loves small-scale projects with character, this teacup design will delight you. In this tutorial, we’ll walk through every step of the process—from gathering materials to adding final details—so you can bring this cozy project to life with ease.
Introduction to the Quilted Teacup Pattern
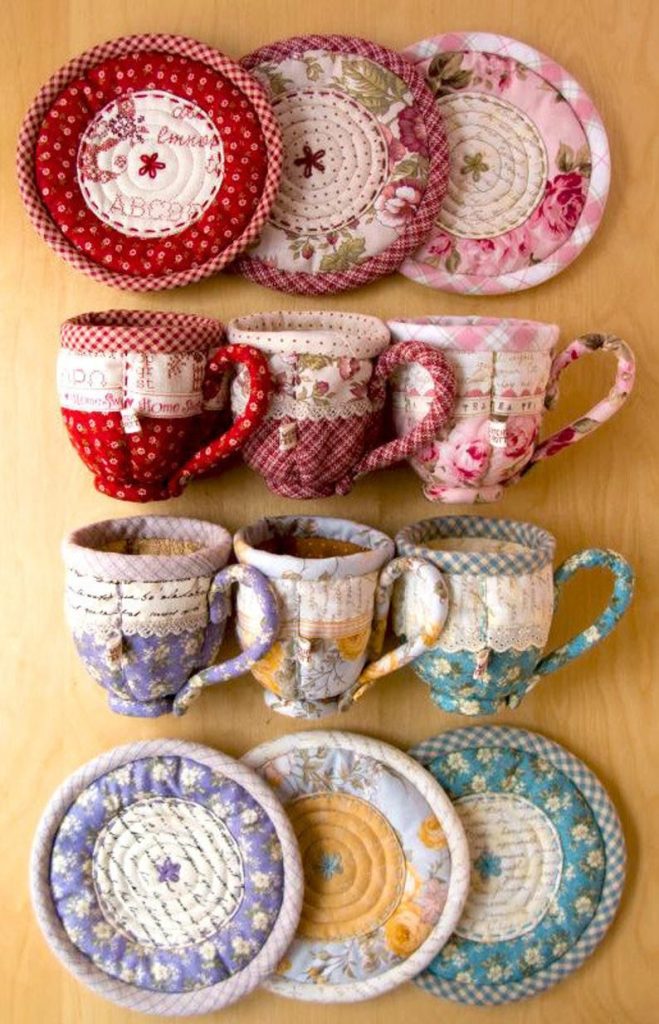
The Quilted Teacup Pattern is a fun and whimsical quilt block that adds warmth and personality to any quilt. These delightful teacups can be used individually as mug rugs, grouped together in a wall hanging, or added to a larger quilt for a tea-themed touch. Their compact size makes them ideal for experimenting with colors, prints, and patchwork techniques.
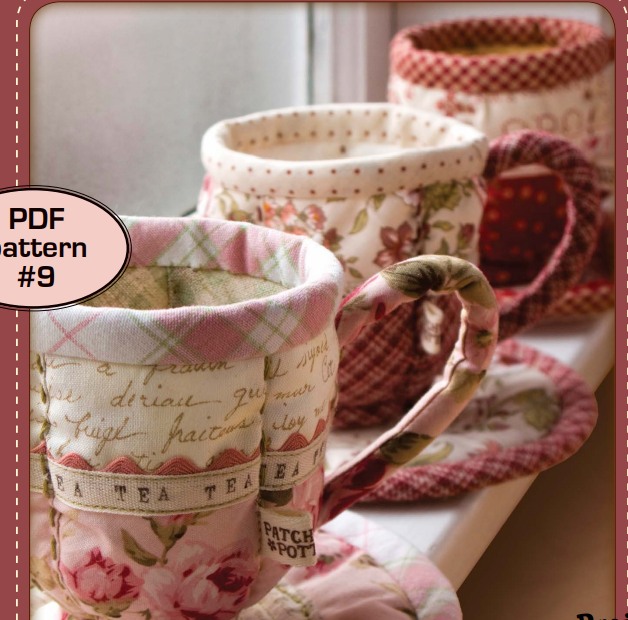
What makes the teacup quilt pattern so appealing is its flexibility. You can keep it traditional with floral fabrics or make it modern with bold solids or geometric prints. This block is great for using up scraps, making it a go-to for sustainable quilting. Plus, the pattern is simple enough for beginners, with straight-line sewing and minimal complexity.
Throughout this guide, we’ll use key quilting terms like quilt and quilt pattern naturally. This will not only help you get familiar with the lingo but also prepare you for exploring more patterns in your quilting journey. So grab a cup of tea and let’s dive into this charming quilting adventure.
Materials You’ll Need
Before we begin, gather the necessary materials to make your quilted teacup pattern. This is a small project, so you won’t need a lot of fabric. However, choosing the right colors and prints will make your teacup shine. Here’s what you’ll need:
- Fabric scraps in coordinating colors (for the teacup, saucer, background, and handle)
- Lightweight fusible interfacing (optional, for stability)
- Batting (cotton or polyester, approx. 6″ x 6″ per block)
- Backing fabric (can be the same size as your block or larger)
- Thread in matching or contrasting color
- Rotary cutter, ruler, and cutting mat
- Pins or clips
- Sewing machine
- Iron and ironing board
If you’re planning to assemble several teacup blocks into a larger quilt, multiply the fabric amounts accordingly. One of the joys of this quilt pattern is that it works beautifully with leftover scraps from other projects.
Step-by-Step Instructions
Let’s walk through how to make a single quilted teacup block. You can later decide how to use it—on its own or as part of a larger quilt. This pattern is sewn with straight seams, making it perfect for beginners who want to practice their accuracy while creating something delightful.
1. Cut Your Pieces
Start by cutting your fabric into the following pieces:
- Teacup body: 3.5″ x 2.5″
- Teacup rim: 3.5″ x 0.5″
- Teacup base/saucer: 3.5″ x 1″
- Handle: Small oval or curved piece (can be appliquéd)
- Background squares: Enough to fill out a 6″ x 6″ block
2. Assemble the Teacup
Sew the rim to the top of the teacup body, and then attach the base to the bottom. Press seams open or to the side. Appliqué the handle to the side of the cup using a zigzag or blanket stitch. Once the teacup is assembled, sew it to your background squares to complete the block.
3. Add Batting and Backing
Create a mini quilt sandwich: place your backing fabric (right side down), then the batting, and finally your teacup quilt block on top (right side up). Pin all layers together. Now, you’re ready to quilt the block!
Quilting and Finishing
Quilting your teacup block is where you can really add personality. Simple straight-line quilting enhances the design without overwhelming the delicate shapes. Here’s how to quilt and finish your block:
1. Quilt the Layers
Use a walking foot on your sewing machine to quilt through all layers. You can stitch around the outline of the teacup or try echo quilting (sewing lines that follow the shape of the cup). For a more playful look, add diagonal lines or free-motion quilting if you feel confident.
2. Trim the Edges
Once your block is quilted, use a rotary cutter and ruler to trim the edges so everything is neat and square. A 6″ x 6″ block is ideal, but feel free to adjust it based on your design.
3. Add Binding or Border
Finish the block with a simple binding using 2.25″ fabric strips or add a fabric border to make it larger. Binding can be sewn by machine or hand-stitched for a clean finish. This step gives your quilted teacup a polished look and ensures durability.
Creative Ideas for Personalization
One of the most fun parts of quilting is making the project truly yours. The quilted teacup pattern offers lots of room for creative expression. Try some of these ideas to personalize your teacup blocks:
1. Play with Prints and Color
Use floral fabric for a vintage teacup, or go with polka dots and pastels for a cottagecore vibe. You can even make a rainbow set of teacups using different scraps from your stash.
2. Add Embellishments
Include small details like embroidered steam lines coming from the cup, or a tiny heart on the cup’s surface. Decorative stitching can add even more charm to your block.
3. Mix and Match Blocks
Combine your teacup block with other quilt patterns like cupcakes, kettles, or hearts. These mix-and-match motifs can be turned into a tea-time-themed wall hanging or baby quilt.
Ideas for Using Your Teacup Block
Now that you’ve created your teacup block, here are some sweet ways to use it. These projects can add a handmade touch to your home or make lovely gifts.
1. Mug Rugs and Coasters
Turn your teacup block into a quilted mug rug. Just bind the edges and you’ve got a perfect little mat for your tea or coffee. Add insulated batting for extra heat resistance.
2. Mini Wall Hanging
Sew a few blocks together and hang them in your kitchen or dining nook. A row of colorful teacups on the wall brings a cozy and cheerful feel to any room.
3. Full-Size Quilt
Feeling ambitious? Make 12 or more teacup blocks and join them together to create a full quilt. Add sashing and borders to frame the blocks, and you’ll have a stunning heirloom quilt pattern full of character.
Conclusion and Call to Action
Quilting is not just about stitching fabric—it’s about crafting joy. The Quilted Teacup Pattern is a wonderful way to explore your creativity, experiment with color, and practice key quilting skills. Whether you’re quilting solo or with a group, this block is sure to spark smiles.
We hope this tutorial inspired you to try something new. If you enjoyed this project, don’t keep it to yourself—share your quilted teacup creations on social media using hashtags like #TeacupQuilt or #QuiltedTeacupPattern. Join online quilt groups, participate in quilt challenges, and most of all, keep quilting with heart.
So brew a fresh cup of tea, gather your scraps, and stitch up some happiness today!