
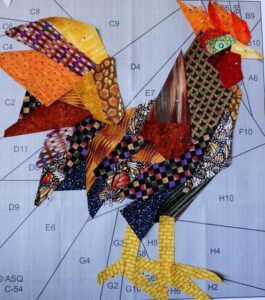
A Rooster Quilt is a vibrant and eye-catching design that adds a touch of farmhouse charm to any space. This tutorial will guide you through the entire process, from selecting materials to completing the final stitches. Whether you are an experienced quilter or just starting, this free pattern will help you create a beautiful and unique quilt featuring a majestic rooster.
Choosing the Right Fabrics
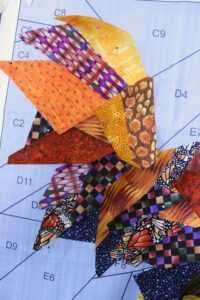
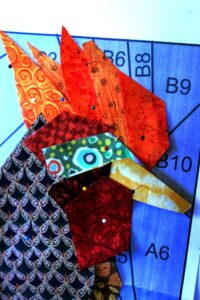
Selecting the perfect fabric is essential for bringing your Rooster Quilt to life. Consider using bold reds, yellows, and blacks to capture the essence of a rooster’s striking feathers. Adding textured prints or batik fabrics can enhance the design’s realism.
Cotton fabric is the best choice for quilt-making due to its durability and ease of handling. Pre-washing your fabric prevents shrinkage and ensures colorfastness. Always iron the fabric before cutting to achieve clean, accurate pieces.
You can also mix solid and patterned fabrics for a more dynamic look. Using contrasting colors will help define the rooster’s shape and make it the focal point of the quilt.
Cutting the Fabric – Measurements and Layout
Precision cutting is crucial to creating a well-balanced quilt. Below are the recommended fabric cuts:
- Rooster Body: 10” x 12” (Cut 1)
- Rooster Tail Feathers: 3” x 8” (Cut 5 in different colors)
- Background Squares: 5” x 5” (Cut 20)
- Border Strips: 3” x Width of Fabric (Cut 4)
- Backing Fabric: 40” x 40”
Use a rotary cutter and quilting ruler to achieve precise measurements. Before sewing, arrange the pieces on a flat surface to visualize the design. This step ensures that the color distribution is well-balanced and that all elements align correctly.
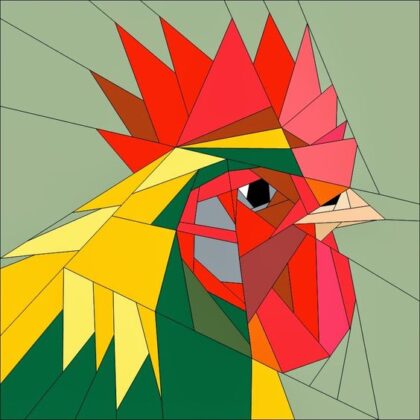
If you’re unsure about color placement, refer to digital quilt patterns or use a quilting design app to preview different layouts before cutting.
Assembling the Quilt Top
Start by piecing together the rooster’s body and tail feathers. Sew each feather piece to the body using a ¼-inch seam allowance, pressing seams as you go to maintain a smooth surface.
Next, attach the background squares around the rooster to create a cohesive quilt block. Arrange them carefully to maintain symmetry and allow the rooster to stand out as the main design element.
Once all blocks are completed, sew them together in rows and then join the rows to complete the quilt top. Press all seams neatly to ensure a flat, professional-looking finish.
Adding Borders and Sashing
Borders frame the Rooster Quilt, enhancing its design and size. Cut four border strips measuring 3 inches wide and the length of the quilt’s edges to frame the rooster design beautifully.
Attach the side borders first, sewing with a ¼-inch seam allowance. Press the seams outward to create a smooth transition. Repeat this step for the top and bottom borders, ensuring that the quilt remains squared.
Adding sashing between blocks can provide additional contrast and structure to the design. Consider using a complementary fabric that matches the background or rooster colors.
Quilting and Batting Selection
Choosing the right batting is essential for the quilt’s comfort and longevity. A lightweight cotton batting is ideal for providing warmth without adding excessive bulk.
Lay the quilt top, batting, and backing fabric on a flat surface, ensuring all layers are smooth and aligned. Secure the layers with quilting pins or basting spray to prevent shifting.
For quilting, a simple stitch-in-the-ditch technique along the seams highlights the rooster’s shape while maintaining the quilt’s softness. Alternatively, free-motion quilting can add artistic texture to the background and feathers.
Binding the Quilt
Binding is the final step that gives the quilt a polished and professional finish. Cut binding strips 2.5 inches wide and long enough to cover all edges.
Join the strips together, pressing the seams open to reduce bulk. Fold the binding in half lengthwise and press before attaching it to the quilt.
Sew the binding to the quilt’s front using a ¼-inch seam allowance, then fold it over to the back and secure it with hand-stitching or machine-stitching. Mitering the corners ensures a clean and crisp finish.
Final Touches and Care Instructions
Once the binding is secure, press the quilt to remove any wrinkles and ensure a neat appearance. Trim any loose threads carefully.
Wash the quilt on a gentle cycle with mild detergent to maintain its colors and softness. Air drying or using a low-heat setting on the dryer helps preserve its quality.
A Rooster Quilt is a delightful addition to any home, offering both warmth and artistic flair. Whether displayed on a wall or draped over a bed, it showcases the craftsmanship and effort behind every stitch.
Conclusion
Creating a Rooster Quilt is a fun and fulfilling project that allows for creative fabric choices and intricate designs. By following this quilt pattern, you can craft a beautiful piece that celebrates farmhouse aesthetics and artistic quilting techniques.
Using digital tools and quilt patterns can help streamline the design process, allowing for customization and experimentation. Whether you’re making this quilt for yourself or as a gift, the vibrant rooster motif is sure to impress.
By following this step-by-step tutorial, you’ll successfully complete a stunning Rooster Quilt, bringing country charm and handmade beauty to your space. Happy quilting!