
Creating a quilt is more than just stitching fabric together — it’s about telling a story through design, color, and texture. The Sandhills Star Quilt Block is a beautiful and beginner-friendly quilt pattern that offers a classic star shape perfect for showcasing your favorite fabric combinations. Whether you’re quilting for the first time or expanding your quilting repertoire, this tutorial will walk you through the entire process with ease.
Introduction to the Sandhills Star Quilt Block
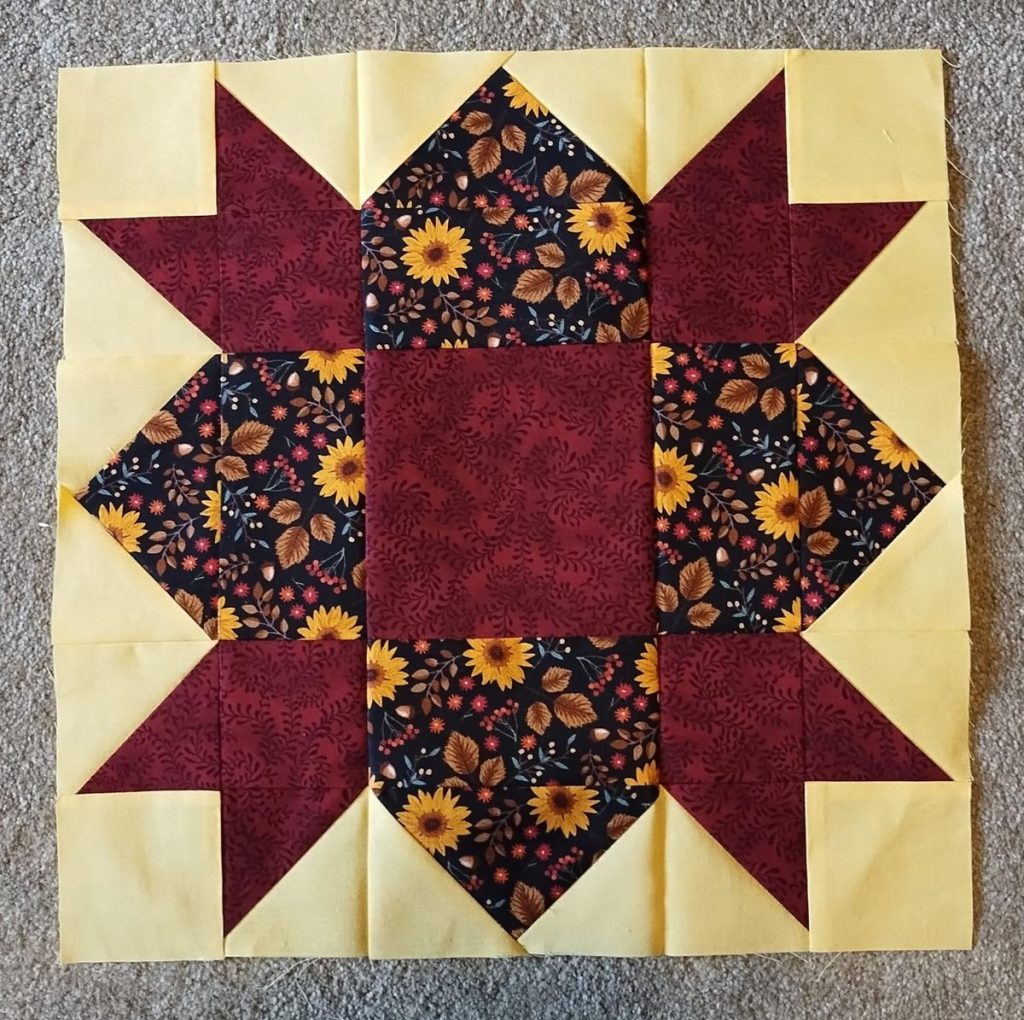
The Sandhills Star is a traditional quilt block known for its symmetrical, radiant star design. It’s both striking and versatile, making it a favorite in many quilting circles. This block stands out beautifully on its own or as a repeated motif in a full-sized quilt.
If you’re new to quilting, this is a fantastic block to start with. It introduces basic quilting skills such as accurate cutting, piecing, and pressing. Plus, the geometric design helps you practice perfect points and symmetry without feeling overwhelming. Let’s explore how to create this stunning quilt pattern step by step.
Once you’ve completed your first Sandhills Star, you’ll be amazed at how customizable this quilt block is. You can change the look entirely by selecting different color palettes, adding borders, or combining it with other quilt blocks to form a larger quilt top.
Materials Needed
Before diving into the quilting process, gather all the necessary tools and fabrics. Being prepared will help the project flow smoothly and keep your quilting space organized.
Materials List:
- Fabric A (for star points): 1 fat quarter or two 10″ squares
- Fabric B (background): 1 fat quarter or two 10″ squares
- Rotary cutter and self-healing cutting mat
- Quilting ruler
- Sewing machine with ¼” foot
- Neutral thread
- Iron and ironing board
- Quilting pins or clips
- Optional: Starch spray for precision pressing
You don’t need expensive tools to start your quilting journey. If you’re missing some items like a rotary cutter, scissors and a ruler will work fine with a little extra care. Choose high-quality cotton fabrics for the best results — they’re easier to cut, piece, and press.
Cutting the Fabric Pieces
Precision is key in quilting. Start by measuring and cutting your fabric pieces according to the quilt pattern below. Accuracy in cutting ensures that your quilt block will align beautifully when sewn together.
Cut the following pieces:
- Fabric A:
• Four (4) squares at 4″ x 4″
• Two (2) rectangles at 4″ x 8″ - Fabric B:
• Four (4) squares at 4″ x 4″
• One (1) square at 8″ x 8″ (center square)
Arrange your pieces on your workspace in the approximate layout of the finished block. This will help you visualize the construction process and avoid confusion as you sew. If this is your first quilt block, labeling the pieces with sticky notes can be a helpful reminder.
Sewing the Star Points
The star points are the focal part of the Sandhills Star quilt pattern. Constructing these points requires careful piecing of triangles and squares to achieve the signature eight-pointed design.
Begin by pairing one Fabric A square with one Fabric B square, right sides together. Draw a diagonal line across the back of the lighter fabric and sew a ¼” seam on either side of the line. Cut along the marked line to yield two half-square triangles (HSTs). Press the seams toward the darker fabric. Repeat this process with the remaining squares to create a total of eight HSTs.
Next, arrange the HSTs around the center square to form the star. Be sure each triangle is oriented to create the star shape. Sew them in pairs, press, and then sew the rows together, taking time to press each seam. Align the points carefully so that the star looks crisp and balanced.
Assembling the Sandhills Star Quilt Block
With all your units prepared, it’s time to assemble the quilt block. Lay out the pieces in a 3×3 grid — the center square, the HST units forming the star, and the rectangles that complete the edges of the block.
Begin sewing the first row: one HST unit, one rectangle, and another HST unit. Repeat for the bottom row. The middle row will consist of an HST unit, the center square, and another HST unit. Sew each row together and press the seams, alternating the direction of the seam allowance for easy nesting when joining rows.
Finally, sew the rows together to complete your quilt block. Press the final seams carefully, and square up your block to 12.5″ x 12.5″ if needed. You now have a complete Sandhills Star quilt block, ready to be used in a larger quilt or as a single decorative piece.
Personalization Ideas
The magic of quilting lies in how each quilter brings a unique touch to their work. Even a traditional quilt pattern like the Sandhills Star can be transformed with just a few creative choices.
Experiment with color: try a monochromatic color scheme or go bold with contrasting hues. You could use batiks for a dramatic effect or soft pastels for a baby quilt. Consider fussy-cutting a motif for the center square to add a personalized detail or focal point to the block.
Another idea is to alternate background colors across your quilt for a dynamic look. Or, frame each block with sashing to give it more space and emphasis. You can even combine the Sandhills Star with other traditional quilt blocks like Flying Geese or Nine Patch to create a diverse and stunning quilt layout.
Finishing and Using the Block
Once your block is complete, there are many ways to incorporate it into a larger project. You could make several Sandhills Star blocks and sew them into a lap quilt, bedspread, or wall hanging. This design also works well as the focal point of a quilted cushion, tote bag, or table runner.
To finish a quilt with multiple blocks, sew the blocks together with or without sashing, add a border if desired, and sandwich the top with batting and backing fabric. Quilt as desired — stitch in the ditch, free-motion quilting, or echo quilting around the star points all work beautifully with this pattern.
Bind your quilt, and it’s ready to be loved, gifted, or displayed. Remember to label your finished project with your name and the date — your quilts are a part of your creative legacy.
Share Your Sandhills Star Creations
Quilting is as much about community as it is about craftsmanship. If you’ve followed this tutorial and created your own Sandhills Star quilt block, we’d love to see it! Share your work on social media or your favorite quilting forums using the hashtag #SandhillsStarQuilt.

Not only will you inspire others, but you’ll also become part of a larger conversation with quilters around the world who are passionate about their craft. Whether you made just one block or an entire quilt, your work matters and adds beauty to the quilting world.
Happy quilting — and may your stitches always be straight and your points always sharp!