
Looking to add a cozy, handmade touch to your holiday decor? A Santa ornament made from a Log Cabin block is the perfect project. This charming creation combines the traditional quilt pattern with festive colors to create a mini ornament that radiates warmth and creativity. Even if you’re a beginner, you’ll find this project accessible and fun, using basic quilting techniques with a twist of holiday spirit.
In this tutorial, we’ll guide you through every step of the process—from gathering materials to sewing the Log Cabin block, shaping your Santa, and adding final details. Let’s dive in and bring this festive little fellow to life!
Materials You Will Need
Before you begin sewing, make sure you have all the materials ready. These are commonly found in most quilting or craft rooms, and a quick trip to a fabric store will cover the rest. Using high-contrast fabrics in red, white, and skin tones will help your Santa stand out.
- Fabric scraps in red, white, beige, and black (100% cotton is ideal)
- Batting (thin, low-loft for structure)
- Backing fabric (muslin or any cotton)
- Thread in matching colors (white, red, beige, black)
- Rotary cutter, ruler, and self-healing mat
- Sewing machine (or hand needle for hand quilting)
- Iron and ironing board
- Ribbon or string for hanging
- Optional: Buttons, beads, fabric glue, felt, or puffy paint for embellishment
This list ensures you have what you need to start your quilt block and turn it into a whimsical ornament. The charm of quilting is often in using what you already have, so feel free to get creative with the scraps you find.
Creating the Log Cabin Block
The Log Cabin block is a classic quilt pattern made by sewing fabric strips around a central square, symbolizing the warmth of a hearth. For our Santa ornament, the center will represent his face, while the surrounding strips will make up his hat, beard, and suit.
- Start with the center square – Cut a 1.5” x 1.5” square from beige fabric. This will be Santa’s face.
- Add white strips – Cut 1” wide strips to represent Santa’s beard. Sew them around the face square using a traditional Log Cabin method (top, right, bottom, left). Press seams as you go.
- Add red strips – Continue with red fabric to represent Santa’s hat and suit. Sew another round of 1” wide strips around the growing square. Keep the colors balanced—use red on top for the hat and sides for his coat.
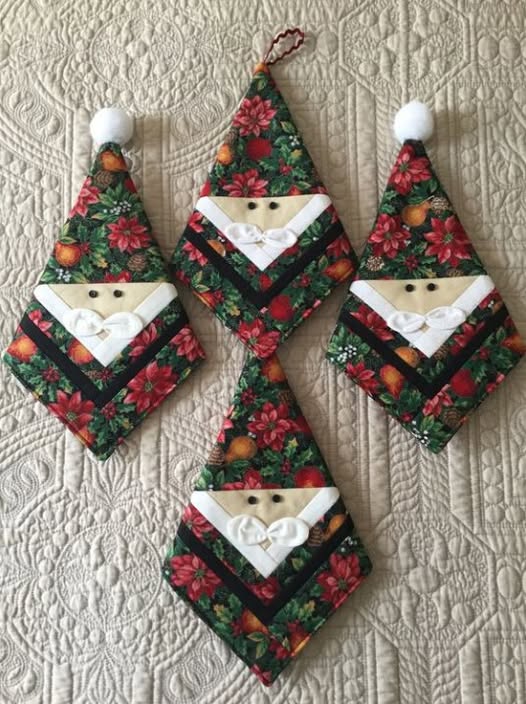
The completed block should measure approximately 4.5” square. If needed, trim the edges to even out the shape. The contrast between the red, white, and beige fabrics will begin to resemble a stylized Santa Claus—simple yet effective.
Assembling the Ornament
Now that your Log Cabin block is finished, it’s time to turn it into a quilted ornament. This step brings together quilting and crafting in a way that’s festive and fun.
- Add batting and backing – Layer your block with batting and a piece of backing fabric. Baste or pin the layers together.
- Quilt the ornament – Quilt along the seams using straight-line quilting. This adds texture and stability to the ornament.
- Trim and shape – Square off your quilted block. If you prefer, you can trim the bottom corners to create a rounded “beard” shape.
Once quilted, your ornament is firm and ready for finishing touches. This is a great time to enjoy the textures and the mini quilt you’ve just created. The process is very similar to quilting a full-size quilt, just on a smaller and more manageable scale.
Adding Santa’s Features
What makes this ornament come alive are the little details. From eyes and a nose to a hat brim and pom-pom, you can bring personality to your mini Santa with just a few simple touches.
- Eyes and nose – Use small black buttons or tiny felt circles for eyes. Add a little pink felt or a stitched French knot for the nose.
- Hat brim and pom-pom – Glue or sew a small piece of white felt across the top edge to serve as Santa’s hat brim. A mini white pom-pom or rolled felt ball can be stitched or glued to one corner.
- Optional beard detail – For extra dimension, stitch curved lines in the white strips to suggest a curly beard.
These details are what elevate a basic quilt block into a recognizable and adorable holiday ornament. Don’t be afraid to experiment with different materials—sequins, embroidery, or even googly eyes can add a playful element.
Finishing and Hanging
Once Santa’s face is complete, you’re just steps away from adding him to your tree, a gift, or a garland. This step is all about clean finishing and preparing the ornament to display.
- Add binding – Use 1” wide red or white fabric strips to bind the edges, just as you would in a traditional quilt. Fold over the edges and hand-stitch or machine sew in place.
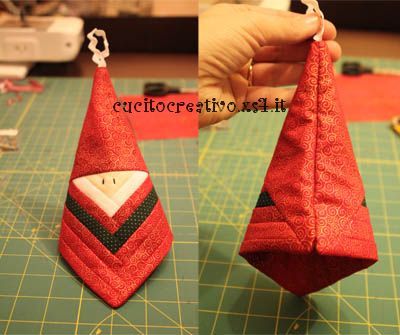
- Insert hanger – Fold a 4” length of ribbon into a loop and sew or glue it to the top back of the ornament.
- Label and date – Don’t forget to add your name and year on the back with fabric marker or a stitched label!
You now have a delightful ornament that’s part quilt, part holiday décor, and completely handmade. These are also wonderful to give as gifts or to start a new tradition of making one each year.
Personalization Ideas
Making your Santa ornament unique is half the fun. There are endless ways to personalize this project and make each version a little different, especially if you’re planning to create a batch.
- Fabric choices – Try using flannel or velvet scraps for a cozier texture.
- Facial expressions – Experiment with embroidery to add smiles, winks, or even glasses.
- Skin tones and hat styles – Make a diverse lineup of Santas with different skin tones and patterned hats.
By tweaking the traditional quilt pattern slightly, you can make snowmen, elves, or even woodland creatures in a similar style. This project is a great jumping-off point for more holiday quilt ornament ideas.
Share Your Santa Ornament!
Now that you’ve created your Santa ornament from a Log Cabin quilt block, it’s time to show it off! Handmade projects like these are meant to be shared and appreciated, and your unique creation can inspire others.
Snap a photo of your ornament and post it on Instagram or Pinterest. Use hashtags like #QuiltPattern, #HolidayQuilt, or #HandmadeOrnament to connect with fellow quilters. Or consider gifting your ornament to a loved one and including a note about how it was made.
Whether you’re new to quilting or a seasoned pro, this mini quilt ornament is a joyful project to return to year after year. Happy quilting—and Merry Christmas!