
Gnomes have become a charming staple in home décor, craft fairs, and seasonal displays. With their long beards, whimsical hats, and adorable noses, they can instantly brighten up any space. The best part? You don’t need to be a master crafter to make your own. Sock gnomes are one of the easiest and most enjoyable DIY projects, perfect for beginners and kids. If you’ve ever followed a quilt pattern, you’ll love the step-by-step nature of this tutorial — except here, instead of fabric squares, we’re using socks, felt, and stuffing.
In this tutorial, we’ll walk through the process of creating your own sock gnome from start to finish. You’ll learn which materials to gather, how to assemble the gnome’s body, beard, and hat, and how to customize it to suit your style. Whether you want a rustic farmhouse gnome, a festive Christmas version, or a spring-themed friend, this guide will help you bring your vision to life. Just like making a quilt, the joy is in the creativity and personalization.
So, grab your materials, set aside a cozy afternoon, and let’s dive into the wonderful world of sock gnomes. By the end of this tutorial, you’ll not only have your first handmade gnome but also the confidence to make more as gifts or for seasonal displays. Who knows — you might even create your own “gnome quilt pattern” by arranging multiple designs together in a decorative setup!
Materials You’ll Need
Before you begin, it’s important to have everything ready. The beauty of sock gnomes is that most of the supplies are easy to find — you may even have them at home already. While some materials are essential, others are optional for those who want to get extra creative.
Basic Materials:
- 1 solid-colored crew sock (for the gnome’s body)
- 1 patterned sock (for the hat)
- Polyester stuffing or rice (for weight)
- Faux fur fabric (for the beard)
- Small wooden bead or pom-pom (for the nose)
- Hot glue gun and glue sticks
- Scissors
- Rubber bands or string
Optional Extras:
- Felt or fabric scraps (for decorations)
- Buttons, lace, or ribbon
- Fabric paint or markers
- Mini quilt pieces (for a patchwork-inspired hat)
As with a quilt pattern, gathering all your “fabric pieces” ahead of time makes the process smoother. This way, once you start, you can focus on the creative part instead of hunting for supplies.
Step-by-Step: Creating the Gnome’s Body
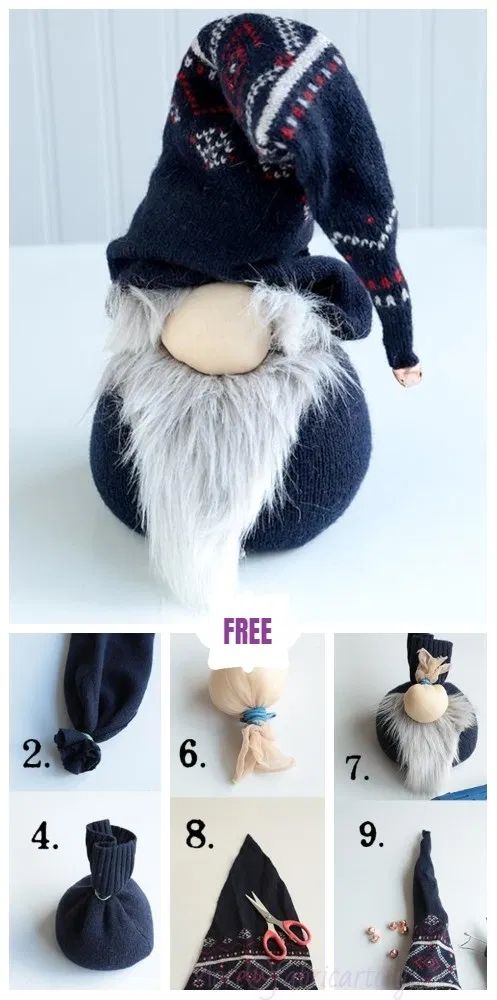
The gnome’s body is the foundation of your project. Start with your solid-colored crew sock and fill it with rice if you want your gnome to stand firmly, or stuffing if you prefer a lighter version. Fill it until it’s about two-thirds full — enough to give it a nice rounded shape, but not so much that the sock stretches too thin.
Once filled, secure the open end tightly with a rubber band or string. This will keep the filling in place and create a rounded top where the hat will eventually sit. If the sock has excess fabric after tying, simply fold it over or trim it. Think of this step as preparing the “base layer” of a quilt — everything else will build on top of it.
For added stability, especially if using rice, you can place the filled sock inside another sock before tying it. This double layer acts like a quilt backing, giving extra support and a smoother surface for the next steps.
Step-by-Step: Making the Beard
A gnome’s beard is arguably its most charming feature, and making it is surprisingly simple. Start by cutting a triangular piece of faux fur fabric. When cutting fur, remember to cut only through the fabric backing to keep the hair strands intact and natural-looking.
Position the beard so that the tip of the triangle points downward and covers about half of the gnome’s body. Secure it in place using hot glue, making sure the edges are firmly attached. If you want a fuller beard, you can layer multiple pieces, much like layering fabric in a quilt pattern for texture.
For a festive touch, consider dyeing or painting the tips of the beard, or adding small accessories like beads or miniature ornaments. Just like in quilting, small embellishments can transform the overall design from simple to spectacular.
Step-by-Step: Crafting the Hat
The gnome’s hat is where you can really let your creativity shine. Take your patterned sock and cut it just above the heel. This tube-shaped piece will become the hat. If the opening is too wide for your gnome’s head, secure it with glue or stitch it slightly tighter to ensure it fits snugly.
Slide the hat over the top of the gnome’s body, making sure it overlaps the beard slightly. Adjust the positioning until you’re happy with the look, then glue it in place. You can leave the top of the hat floppy or add a small amount of stuffing to give it structure — both styles are charming in their own way.
If you love sewing or quilting, this is where you can experiment with a patchwork hat made from different fabric scraps. By stitching together small pieces, much like following a quilt pattern, you can create a one-of-a-kind hat that tells a story through color and texture.
Step-by-Step: Adding the Nose
No gnome is complete without its signature round nose. Wooden beads are a popular choice, but you can also use pom-poms or even fabric-covered buttons. Attach the nose directly under the hat’s edge, centered above the beard. Use a generous dab of hot glue to ensure it stays in place.
The nose not only adds personality but also hides the edge where the hat meets the beard, giving the gnome a polished look. You can paint the nose for different effects — a rosy pink for a winter gnome or a soft beige for a springtime one.
In quilting, finishing touches like binding or top-stitching can elevate the final result, and in gnome-making, the nose serves a similar role — it’s the detail that brings everything together.
Personalization Ideas
One of the best parts of making sock gnomes is that no two have to be alike. You can create themed gnomes for holidays, seasons, or special events. For Christmas, try red and green hats with white beards. For Easter, pastel hats and small felt flowers work beautifully. For autumn, earthy tones and tiny felt leaves add a cozy vibe.
Consider incorporating quilt elements into your gnome’s design. For example, use leftover quilt fabric scraps for the hat or sew a miniature quilt for the gnome to “hold.” This not only makes your project unique but also ties in your love of quilting with this new craft.
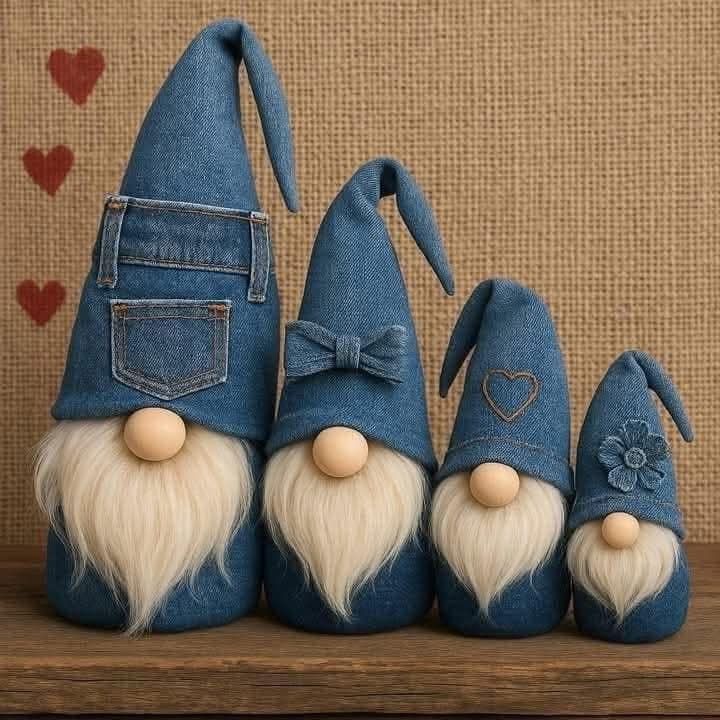
You can even create a “family” of gnomes with different heights, hat styles, and accessories. Arranging them together is like displaying a series of quilt blocks — each one different but part of a harmonious whole.
Displaying and Gifting Your Gnome
Once your gnome is complete, you’ll want to find the perfect place to display it. Mantels, bookshelves, and entryway tables are all great options. Pair your gnome with seasonal décor for extra charm — a Christmas gnome with a miniature tree, or a summer gnome with seashells.
Sock gnomes also make fantastic gifts. Because they’re quick to make, you can easily produce several in one crafting session. Wrap them in tissue paper or place them in a small gift bag for a thoughtful, handmade surprise. If you’ve ever gifted a quilt, you know how special it feels to share something made with care — sock gnomes carry the same heartfelt touch.
For craft fairs or charity fundraisers, consider offering themed sets or customizing gnomes with names. This makes them more personal and appealing to buyers.
Share Your Creations
Now that you’ve learned how to make your own sock gnomes, it’s time to let your creativity run wild. Experiment with different materials, colors, and accessories. Don’t be afraid to mix in elements from other crafts you enjoy, whether it’s knitting a scarf for your gnome or making a miniature quilt for them to “use.”

If you post your creations online, tag them with keywords like quilt and quilt pattern to connect with other crafters who share your passion for handmade projects. Sharing your work not only inspires others but also opens up opportunities to learn from fellow makers.
So, gather your socks, scissors, and glue, and start creating. Before you know it, you’ll have a whole lineup of gnomes bringing joy to your home — and maybe even sparking a new tradition in your crafting journey.