
If you love the charm of handmade kitchen décor, this Quilt pattern will steal your heart. The “Stitch Up Some Veggies for Your Kitchen” project combines bright fabrics, playful designs, and the satisfaction of creating something truly special. Whether you’re decorating your own kitchen or crafting a gift for a friend, this vegetable-inspired quilting project is a fun and beginner-friendly way to bring color and creativity to your home.
In this tutorial, you’ll learn how to create adorable veggie-themed quilt blocks, assemble them into a small wall hanging or table runner, and personalize your design. The process is simple, the results are beautiful, and every stitch will remind you how joyful quilting can be. So, grab your favorite fabrics and let’s start stitching up some veggies!
Materials You’ll Need
Before you start, gather your materials so everything’s ready when inspiration strikes. For this Quilt pattern, you won’t need anything too fancy — just the essentials for a cozy, colorful quilting session.
Materials List:
- Assorted cotton fabrics in vegetable colors (green, red, yellow, orange, purple, and white)
- Background fabric (neutral tones like cream, beige, or light gray)
- Fabric scraps for stems and leaves
- Batting (low-loft cotton or polyester)
- Backing fabric
- Matching thread for piecing and quilting
- Scissors or rotary cutter
- Cutting mat and quilting ruler
- Pins or fabric clips
- Iron and ironing board
- Sewing machine (or needle if hand-stitching)
Keep in mind that this Quilting pattern is flexible — you can use fabric scraps you already have, mix textures, or even include prints that resemble real vegetables for a playful touch. The more variety, the more charming your finished piece will look.
Step 1: Cutting Your Fabric Pieces
Start by choosing which veggies you’d like to include in your quilt design — maybe carrots, tomatoes, bell peppers, or eggplants. You can sketch out the shapes on paper first to help plan your layout. Once you’re happy with your design, it’s time to cut your fabric.
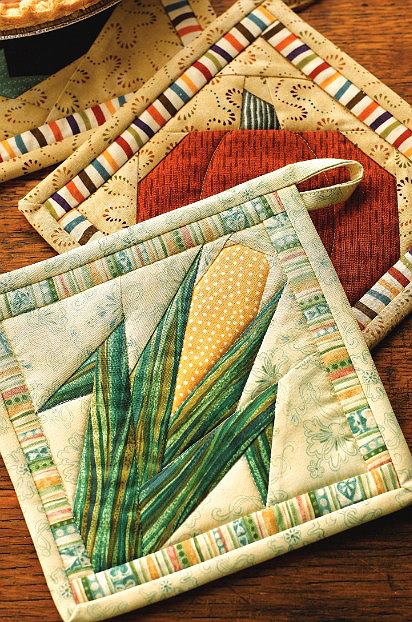
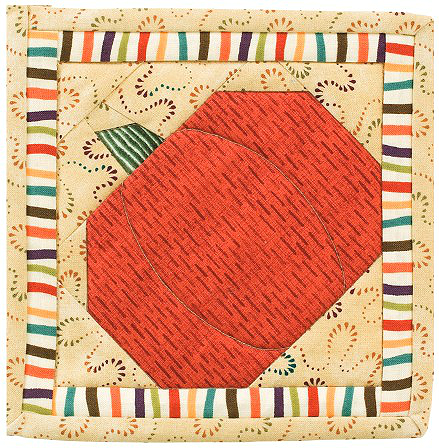
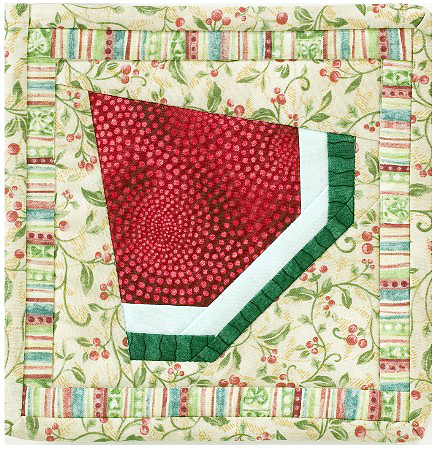
Using your quilting ruler and rotary cutter, carefully cut fabric pieces according to your chosen shapes. For example, for a carrot block, cut an orange triangle and a small green top for the leaves. For a tomato, you can use a red circle with a little green stem. Try to keep your veggie shapes around 5–7 inches each so they’re easy to piece together and quilt later.
Don’t forget your background squares! Cut enough neutral-colored squares or rectangles to frame your veggie pieces. This helps your vegetables stand out and gives your quilt a clean, modern look. Iron your fabric pieces flat to remove any wrinkles — crisp edges make for cleaner seams when sewing.
Step 2: Assembling the Veggie Blocks
Now comes the fun part — piecing together your adorable veggie blocks! Start with one vegetable at a time to keep things organized. Place your pieces right sides together, pin if necessary, and sew along the edges with a ¼-inch seam allowance. Press the seams open or to one side with an iron for a neat finish.
If you’re creating appliqué-style veggies, cut your shapes and use fusible web to attach them to your background squares. Simply iron them in place and stitch around the edges with a zigzag or blanket stitch to secure them. This technique gives your quilt a playful, layered effect that’s perfect for whimsical kitchen décor.
Once all your veggie blocks are assembled, lay them out on a flat surface to decide on the final arrangement. You can alternate colors, mix vegetable types, or even add fabric “labels” with embroidered names like carrot, pepper, or tomato. This step is your creative playground — have fun experimenting!
Step 3: Sewing the Quilt Top
With your veggie blocks ready, it’s time to sew them together into a quilt top. Arrange them in rows or columns, depending on whether you want a rectangular wall hanging, a table runner, or even a small kitchen quilt for display.
Sew the blocks together using the same ¼-inch seam allowance. Take your time matching corners and aligning seams so your quilt looks neat and professional. After sewing each row, press the seams flat with an iron. Continue until your quilt top is fully pieced together.
You can add a simple border around your quilt using coordinating fabric strips — perhaps green to represent the garden or a checkered print for a farmhouse kitchen vibe. The border frames your work beautifully and makes it look more complete.
Step 4: Layering and Quilting
Now it’s time to transform your quilt top into a finished quilt! Start by layering your quilt sandwich: lay the backing fabric right side down, place the batting on top, and then position your quilt top right side up. Smooth out any wrinkles and pin or baste the layers together.
Quilting can be as simple or decorative as you like. Beginners might enjoy straight-line quilting — just sew parallel lines across your quilt using a walking foot. For a more playful touch, you can stitch around the veggies or add gentle curves to mimic the natural shapes of vegetables.
Choose thread colors that complement your design — green for leaves, orange for carrots, or white for a clean look. Remember, quilting doesn’t have to be perfect! Each stitch adds character and warmth to your handmade masterpiece.
Step 5: Binding and Finishing Touches
Once you’re happy with your quilting, it’s time to bind the edges. Trim any excess batting or backing fabric, making sure your quilt edges are even. Cut 2½-inch-wide strips of fabric for your binding, join them end to end, and fold them in half lengthwise.
Attach the binding to the front of your quilt with a sewing machine, then fold it over to the back and hand-stitch it in place using a slip stitch. Take your time here — neat binding gives your quilt a polished, professional finish.
For an extra special touch, consider adding a fabric label on the back with your name, the date, or a fun message like “Handmade with love in my kitchen.” You can also sew a small hanging loop at the top if you plan to display your quilt on the wall.
Personalization Ideas
This Quilting pattern is perfect for experimenting with colors, textures, and techniques. Here are a few fun ideas to make your project truly your own:
- Play with fabric textures: Mix cotton with linen or canvas for extra depth.
- Add embroidery: Stitch veggie names, vines, or little bees buzzing around your quilt.
- Use prints: Choose fabrics with polka dots, gingham, or tiny floral patterns to make your veggies pop.
- Make it seasonal: Try pastel shades for spring veggies or deep, earthy tones for autumn harvest themes.
- Create a matching set: Use your leftover blocks for potholders, placemats, or even a coordinating apron.
No matter how you personalize it, your kitchen quilt will bring warmth and charm to your home — and might even inspire more home-cooked meals!
Share Your Veggie Quilt with the World!
Once your quilt is complete, don’t keep it to yourself — share your creativity! Post photos on social media, tag your favorite quilting groups, or display it proudly in your kitchen. Projects like this are perfect conversation starters and wonderful ways to connect with other quilters.
Remember, quilting is not just about the finished piece — it’s about the joy of creating, the comfort of stitching, and the stories woven into every fabric square. Whether you’re a beginner or a seasoned crafter, your veggie-themed quilt is a reminder that handmade art brings life and love into everyday spaces.
So, grab your fabrics, thread your needle, and stitch up some veggies for your kitchen. You’ll be amazed at how a simple Quilt pattern can fill your home with color, warmth, and a touch of handmade happiness.