
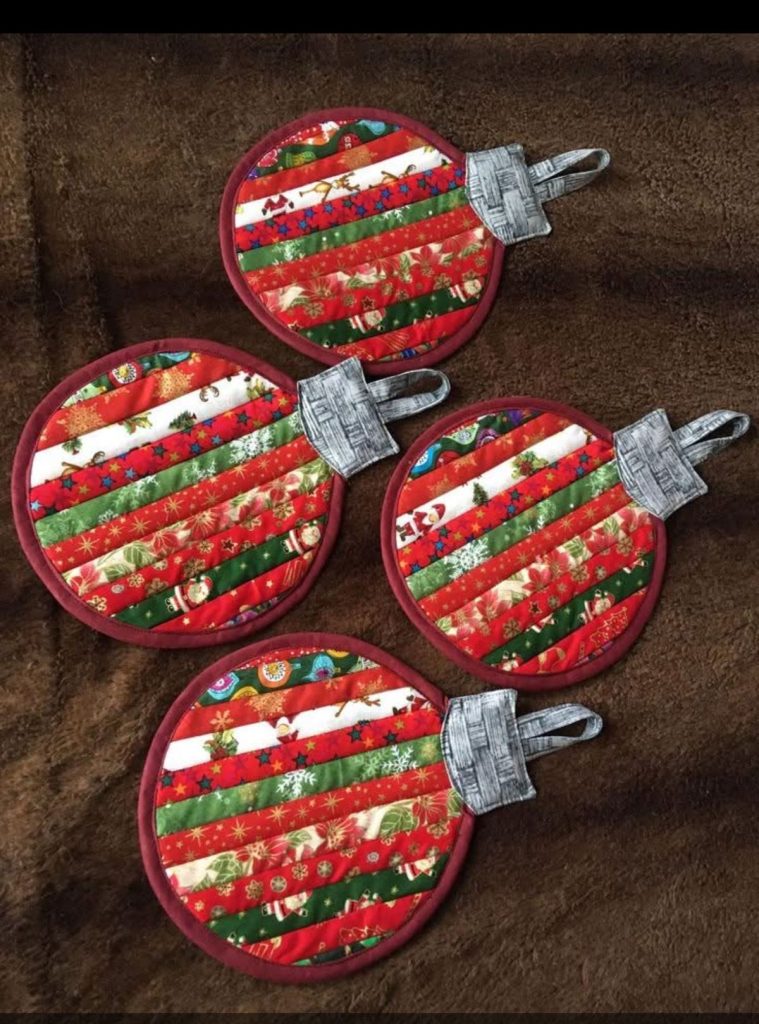
Nothing says holiday cheer quite like handmade ornaments! This Stripey Christmas Ornament Free Pattern is the perfect way to bring color, texture, and warmth to your festive decorations. Whether you’re an experienced quilter or just starting your quilting journey, this fun and easy project combines classic quilting techniques with a modern holiday twist. Using your favorite fabric scraps, you’ll create adorable stripey ornaments that make your Christmas tree truly one of a kind.
Let’s dive into the full tutorial! You’ll find everything here—from materials to step-by-step instructions, customization tips, and even inspiration for matching projects. Grab your sewing machine, pour yourself a cup of cocoa, and let’s get quilting!
Materials You’ll Need
Before you start your Stripey Christmas Ornament, it’s best to gather all your supplies in one place. This project doesn’t require much fabric, so it’s an ideal way to use leftover pieces from previous quilts or sewing projects. The beauty of quilting lies in its creativity, and this pattern lets you mix and match fabrics to your heart’s content.
Here’s what you’ll need:
- Fabric scraps in coordinating colors (reds, greens, golds, or whatever holiday palette you love)
- Lightweight batting or fusible interfacing
- Backing fabric (plain cotton or festive print)
- Ribbon or twine for hanging
- Basic sewing tools: scissors, pins, ruler, and rotary cutter
- Iron and ironing board
- Optional: embellishments like beads, sequins, or small buttons
Make sure your fabrics are pre-washed and pressed. Crisp, flat fabric is easier to handle and helps your stripes line up neatly. Once your materials are ready, you’re set to start cutting and stitching your way to a charming handmade Christmas ornament.
Cutting and Preparing Your Strips
The signature look of this project comes from its stripey pattern—a simple yet elegant quilting design made from narrow strips of fabric. This is a fantastic opportunity to experiment with color balance, fabric texture, and pattern mixing, all key elements of any great quilting pattern.
Start by cutting your chosen fabrics into strips that are about 1 inch wide and 6 inches long. Don’t worry about being too precise; slight variations add charm and a handmade feel. Next, arrange your strips in the order you’d like them to appear. Alternating dark and light fabrics or adding a metallic accent can create a beautiful, festive rhythm.
Once you’re happy with your arrangement, press the strips flat. You can also apply fusible interfacing to the back of each strip to make the pieces easier to handle. This step helps maintain crisp lines and prevents fraying as you stitch everything together.
Sewing the Stripes Together
Now it’s time to start sewing! This is where your quilting skills shine, even if you’re a beginner. Lay two strips right sides together and sew along one long edge using a ¼-inch seam allowance. Continue adding strips one by one, always pressing seams open or to one side as you go. Pressing is essential—it keeps the surface flat and ensures your finished ornament looks neat and professional.
Once all the strips are joined, give your striped panel a final press. You should now have a colorful piece of quilted fabric that can be transformed into various shapes. If you’re making multiple ornaments, you can create a larger striped panel and cut it into smaller pieces later.
For an extra touch, you can topstitch along each seam line using metallic or contrasting thread. This adds texture and shimmer, catching the Christmas lights beautifully. It’s a small detail that makes your ornament sparkle—literally!
Creating the Ornament Shape
With your striped panel complete, it’s time to give your ornament its shape. You can use simple templates like circles, hearts, stars, or even Christmas trees. Trace the shape onto the back of your quilted panel using a fabric-safe pen or pencil. Then, cut it out carefully with fabric scissors.
Cut a matching shape from your backing fabric and one from batting. Layer them in this order: backing fabric (right side down), batting, and striped top (right side up). Pin or clip the layers together securely. This mini quilt sandwich is the foundation of your Stripey Christmas Ornament.
If you’re feeling creative, you can quilt simple lines or curves across the ornament using your sewing machine or by hand. Even a few stitches will add lovely texture and depth, bringing your quilting pattern to life. Once quilted, trim the edges neatly to keep everything symmetrical.
Assembling and Finishing Touches
To complete your ornament, place your quilted front and backing pieces right sides together. Insert a small ribbon loop at the top for hanging. Sew around the edges with a ¼-inch seam allowance, leaving a small opening for turning. Clip the curves or corners slightly to reduce bulk.
Turn your ornament right side out through the opening, gently push out the edges, and press it flat. Hand-stitch the opening closed using a slip stitch or invisible ladder stitch. And just like that, you have a handmade, quilted Christmas ornament ready to hang on your tree!
For extra flair, add embellishments—tiny buttons, sparkly beads, or embroidery. You can also use glitter thread or hand-quilt decorative stitches. These small details personalize your project and make it even more special.
Personalization and Creative Variations
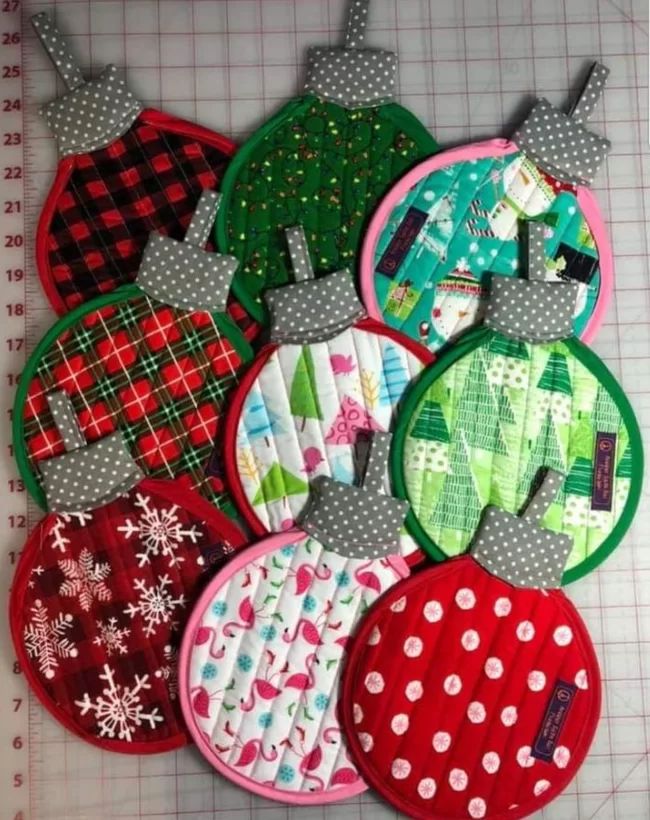
One of the best parts of this free quilting pattern is how versatile it is. Once you’ve mastered the basic technique, the possibilities are endless! You can adapt the design to fit your holiday color scheme or use non-traditional hues for a modern twist. Think pink and gold, navy and silver, or even a cozy rustic look with plaids and linen.
For a coordinated look, make a set of ornaments using different striped patterns—horizontal, diagonal, or vertical. You can even turn your Stripey Christmas Ornament into gift tags, garlands, or small quilted coasters. The concept is simple but incredibly flexible, allowing your creativity to shine.
This project also makes a heartfelt handmade gift. Tie one onto a wrapped present or place a few in a clear ornament box tied with a ribbon. Your friends and family will appreciate the time and love you put into creating something so unique.
Tips for Quilting Beginners
If this is your first time trying a quilting pattern, don’t worry! This ornament project is beginner-friendly and forgiving. The small size means it’s easy to handle and quick to finish, so you can experiment and gain confidence without committing to a large quilt.
Take your time aligning your fabric strips and pressing between each step. Consistent pressing is one of the secrets to professional-looking quilted pieces. And remember—imperfections are part of the charm. The slightly uneven lines or mismatched stripes add character and show that your ornament was lovingly handmade.
Most importantly, have fun with the process. Quilting, especially during the holidays, is about creativity, relaxation, and sharing joy. So, turn on your favorite Christmas playlist, light a candle, and enjoy every stitch.
Share Your Stripey Christmas Ornament Creations!
Congratulations! You’ve just finished your very own Stripey Christmas Ornament using this free quilting pattern. It’s colorful, festive, and made with heart—a true reflection of the handmade holiday spirit. Every ornament tells a story, from the fabrics you chose to the stitches you sewed with care.
If you loved this project, don’t keep it to yourself—share it! Post photos of your ornaments on social media and tag your fellow quilters. Inspire others to dive into the joy of quilting this holiday season. Handmade decorations bring warmth to every home, and your creativity can brighten someone’s day.
So go ahead—make a few more, gift them, or even start a yearly tradition of sewing a new design each Christmas. The possibilities are endless when you combine fabric, imagination, and festive spirit. Happy quilting, and Merry Christmas!