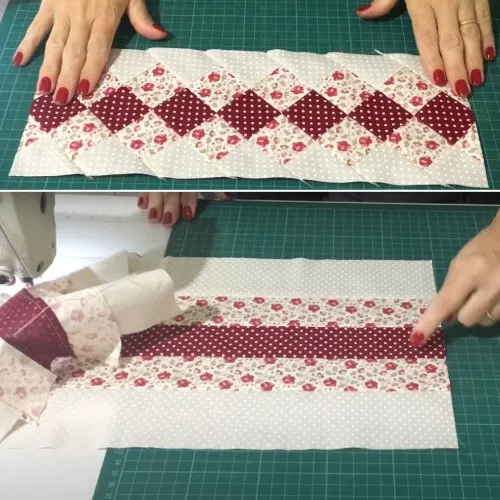
Quilting is an art that blends creativity with precision, and one of the most defining aspects of a quilt is its edges. The finishing touch of a quilt not only adds durability but also enhances its overall appeal. This tutorial will guide you through the steps to create stunning quilted edges, ensuring a professional and polished result.
The Importance of Quilted Edges
Quilted edges are more than just a decorative feature; they serve a functional purpose in preserving the integrity of your quilt. A well-finished edge helps prevent fraying and wear over time, making your quilt last longer. Choosing the right finishing technique can transform a simple quilt into a masterpiece.
Different quilt patterns call for different edge finishes. Whether you opt for binding, scalloped edges, or a piped finish, the choice depends on the style you wish to achieve. Understanding the available options ensures that your quilt edges complement the overall design.
Apart from aesthetics, quilt edges provide a comfortable and smooth transition between the layers. This is especially important for baby quilts or those used daily, as well-executed edges enhance comfort and usability.
Materials Needed for Stunning Quilted Edges
To achieve professional-looking quilted edges, gathering the right materials is essential. Start with high-quality fabric that complements your quilt’s design. Cotton, linen, or satin can add an elegant touch, depending on your quilt pattern.
A rotary cutter and self-healing cutting mat ensure precise fabric cuts. Using a quilting ruler will help you maintain uniform edge strips, resulting in a polished finish. Consistency in fabric width plays a crucial role in achieving stunning quilted edges.
Other essentials include matching thread, binding clips, a sewing machine with a walking foot, and an iron for pressing. These tools will streamline the quilting process and ensure a neat, professional look.
Choosing the Right Binding Style
Selecting the right binding style can elevate the look of your quilt. Single-fold binding is ideal for lightweight quilts, while double-fold binding provides extra durability for frequently used quilts. Understanding the differences will help you choose the best technique for your project.
Scalloped edges create an elegant, decorative touch. This technique requires careful marking and cutting to ensure uniform curves. Using bias binding allows for flexibility around curved edges, making it a preferred choice for intricate quilt patterns.
For a modern and sleek finish, consider using piped edges. This method incorporates a thin strip of contrasting fabric, adding a sophisticated outline to your quilt. Piping works particularly well with geometric quilt designs, emphasizing sharp, clean lines.
Step-by-Step Guide to Creating Stunning Quilted Edges
Step 1: Preparing the Fabric Strips
Cut your binding strips from coordinating fabric. For double-fold binding, cut strips 2.5 inches wide. If you prefer a narrower edge, reduce the width to 2 inches. Make sure to cut on the bias for scalloped or curved edges to allow flexibility.
Join the strips at a 45-degree angle using a quarter-inch seam allowance. Press the seams open to reduce bulk. Folding and pressing the entire strip in half lengthwise ensures easy application during sewing.
If adding piping, sew the piping cord into a narrow fabric strip before attaching it to the quilt edge. This will give a crisp, defined look to your finished quilt.
Step 2: Attaching the Binding to the Quilt
Align the raw edge of the binding with the raw edge of your quilt top. Use binding clips or pins to secure the strip in place. Begin sewing with a quarter-inch seam allowance, ensuring the binding remains even throughout.
For mitered corners, stop sewing 1/4 inch before the edge, fold the binding at a 45-degree angle, and continue along the next side. This technique creates professional-looking corners with clean, crisp folds.
Once the binding is attached, fold it over to the quilt’s backside and secure it by hand stitching or topstitching. Ensure the stitches are invisible for a flawless finish.
Step 3: Finishing Touches
Press the quilt edges with an iron to set the stitches and remove any wrinkles. A final topstitch around the edges provides reinforcement, keeping the binding securely in place.
For a decorative touch, consider using a contrasting thread color or a decorative stitch pattern. This can add a unique, artistic element to your quilt, making it stand out even more.
Trim any loose threads and inspect the edges for consistency. If necessary, touch up any uneven sections to ensure a seamless appearance.

Common Mistakes and How to Avoid Them
One common mistake in quilting edges is uneven binding width. To prevent this, always measure and cut your strips precisely. Using a quilting ruler helps maintain uniformity, ensuring a balanced look.
Skipped stitches can occur when sewing thick layers. To avoid this, use a walking foot and adjust your machine’s tension settings accordingly. This ensures even feeding of fabric layers and a smooth stitch line.
Fraying fabric edges can ruin the appearance of a quilt. Always pre-wash and press your fabric before cutting to prevent fraying. Additionally, using pinking shears or a serger can provide extra durability.
Final Thoughts on Stunning Quilted Edges
Mastering quilted edges takes patience and practice, but the results are worth the effort. A well-finished edge not only enhances the beauty of your quilt but also adds longevity and structure to your creation.
Experimenting with different edging styles allows you to discover unique ways to complement your quilt patterns. Whether you choose a classic binding or an intricate scalloped design, each technique brings a distinctive touch to your work.
By following this tutorial and paying attention to details, you’ll be able to create stunning quilted edges that showcase your craftsmanship. Happy quilting!
