
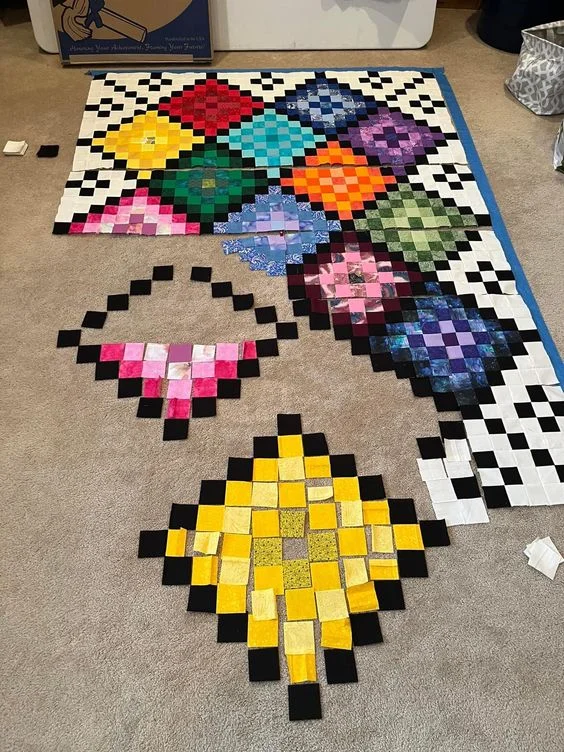
Creating a Trip Around the World Lap Quilt is a fantastic way to explore vibrant color patterns and symmetrical designs in quilting. This timeless design consists of a central point from which colors radiate outward, forming a visually appealing and dynamic effect. This tutorial will guide you through the entire process, from fabric selection to the final stitch, ensuring that you create a stunning and cozy lap quilt.
Choosing Fabrics and Materials
Selecting the right fabrics is crucial to achieving the signature quilt patterns of a Trip Around the World Quilt. Look for fabrics in complementary colors that create a smooth gradient effect. Solid and small-print fabrics work best to highlight the transitions between colors.
For a lap-sized quilt measuring approximately 50” x 60”, you will need eight different fabric colors. Purchase at least ¼ yard of each fabric to ensure you have enough material. Additionally, you will need batting, backing fabric, thread, a rotary cutter, and a quilting ruler.
High-quality cotton fabric is recommended as it is easy to cut and sew while providing durability. Choose a soft cotton batting for a warm yet lightweight quilt, and select a backing fabric that complements your color scheme.
Cutting the Fabric Pieces
Precision cutting is essential for ensuring clean, even rows in your quilt. Below are the recommended measurements:
- Cut each of the eight fabric colors into 2.5” x WOF (Width of Fabric) strips.
- You will need multiple strips from each fabric color to complete the design.
- Arrange the fabric strips in order from the lightest to the darkest shade.
Lay the strips on a flat surface to visualize the pattern before sewing. This step will help in creating a harmonious transition of colors in your quilt.
Piecing the Quilt Top
To assemble the quilt top, start by sewing the fabric strips together in the arranged order, using a ¼-inch seam allowance. Press the seams open after sewing each strip to maintain a flat surface.
Once all strips are sewn together, sub-cut the assembled fabric panel into 2.5-inch-wide segments. These segments will be sewn together to form a tube-like structure, which is the foundation of the Trip Around the World Quilt pattern.
Next, carefully unpick stitches at specific points in each row to create staggered color placements. This process is what forms the dynamic pattern characteristic of this design. Lay out your segments before final assembly to ensure a smooth gradient effect.
Assembling the Quilt Top
With your fabric tube deconstructed into staggered strips, it’s time to assemble the full quilt top. Start by sewing each strip to the next, aligning the colors to maintain the cascading pattern.
Pin each strip in place before sewing to prevent shifting. Use a ¼-inch seam allowance and press each seam open to reduce bulk and achieve a smooth finish.
Once all strips are sewn together, trim any uneven edges to square up the quilt top. This step ensures that the finished quilt will have clean and professional-looking edges.
Adding Batting and Backing
Lay your quilt top flat and place a layer of batting beneath it. Next, add the backing fabric, ensuring all layers are smooth and properly aligned.
Pin or baste the layers together to prevent shifting during quilting. You can use safety pins, basting spray, or long basting stitches for this step.
To enhance the quilt patterns, consider quilting along the seam lines or using a diagonal quilting design. This approach will emphasize the dynamic effect of the Trip Around the World Quilt while ensuring durability.
Binding and Finishing Touches
The final step is to bind the edges of your quilt. Cut binding strips 2.5 inches wide and join them end-to-end to form one continuous strip.
Sew the binding to the front of the quilt, then fold it over to the back and secure it with either hand-stitching or machine stitching. Miter the corners for a clean, professional finish.
After completing the binding, give your quilt a final press with an iron and trim any loose threads. Your Trip Around the World Lap Quilt is now ready to be enjoyed!
Final Thoughts
Creating a Trip Around the World Lap Quilt is a rewarding quilting project that allows you to experiment with colors and precise piecing techniques. Whether you’re making this quilt as a gift or for personal use, the intricate yet structured design is sure to impress.
By following this tutorial, you will gain valuable quilting experience while crafting a unique and vibrant piece. Adjust the colors and fabric choices to match your personal style, and enjoy the process of quilting! Happy sewing!