
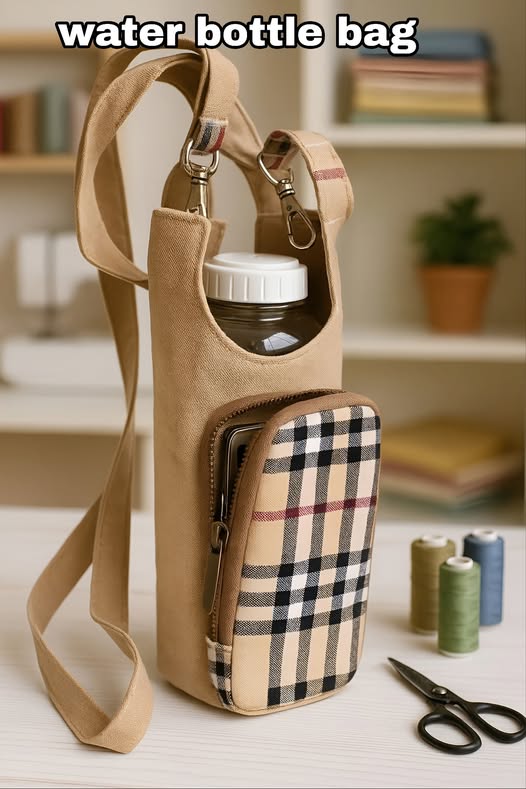
Carrying a water bottle everywhere is a great way to stay hydrated, but let’s be honest—it’s not always the most stylish accessory. That’s where the Water Bottle Bag Free Pattern comes in! With this simple and beginner-friendly tutorial, you can create your own fabric carrier that is both practical and personalized. Whether you’re heading to the gym, going for a hike, or strolling through a farmer’s market, your handmade bag will make staying hydrated feel like a fashionable choice.
This project is also a wonderful way to use up fabric scraps or to experiment with quilt techniques. You can turn it into a small quilt pattern project, adding extra charm and durability. Plus, because it’s small, it’s quick to make—perfect for a weekend crafting session or as a thoughtful handmade gift for friends and family.
In this guide, we’ll walk through all the steps, from gathering your materials to sewing your water bottle bag. You’ll also find customization ideas so your bag reflects your style perfectly. Let’s get started on this practical yet beautiful DIY project!
Materials You Will Need
Before you begin, it’s important to gather all your supplies. The beauty of this project is that it doesn’t require a lot of expensive tools or rare fabrics—you might already have everything you need in your sewing stash. This makes it a budget-friendly project and a great way to repurpose leftover fabric pieces from other quilt projects.
Here’s what you’ll need for your Water Bottle Bag Free Pattern:
- 1 piece of fabric measuring 11” x 12” for the outer bag
- 1 piece of fabric measuring 11” x 12” for the lining
- 1 piece of fusible interfacing (same size as the outer fabric) for stability
- 1 piece of batting if you want a quilted look
- Matching thread
- Sewing machine and basic sewing tools (pins, scissors, measuring tape)
- Fabric strap or cotton webbing for the handle (about 36” long)
- Optional: quilt ruler and rotary cutter for precise cutting
If you love the texture and look of quilts, you can replace the single fabric outer layer with a mini quilt pattern you’ve made. This not only adds character but also makes your water bottle bag sturdier. Choosing colorful fabrics can instantly make your bag stand out.
Step-by-Step Instructions
Making a water bottle bag is simpler than it may seem, especially with a clear step-by-step process. Even if you’re a beginner, you’ll find this tutorial approachable and fun. Follow along and watch your bag take shape in no time.
- Prepare Your Fabric
Cut your outer fabric, lining fabric, and interfacing to the same dimensions (11” x 12”). If you’re using a quilted outer layer, make sure the quilting is complete before cutting to size. Fuse the interfacing to the wrong side of your outer fabric following the manufacturer’s instructions. - Sew the Outer Bag
Fold the outer fabric in half lengthwise with right sides together, and sew along the long edge and one short edge with a ¼-inch seam allowance. This forms the main pouch. Repeat the same process for the lining fabric but leave a 2” gap at the bottom for turning later. - Box the Corners
Flatten the bag so the side seam and bottom seam align, forming a triangle at each bottom corner. Measure 1.5” from the tip of the triangle and draw a line. Sew along this line, then trim the excess fabric. Repeat for the lining.
Adding the Strap and Assembly
With the main body of the bag complete, it’s time to add the strap and put everything together. This part is exciting because the bag will start to look like the finished product you’ve envisioned.
- Attach the Strap
Pin the strap ends to the sides of the outer bag, positioning them so they are evenly spaced from the seams. Baste them in place with a few stitches to prevent shifting. - Combine Outer and Lining
Place the outer bag inside the lining with right sides together, making sure the strap is sandwiched inside. Align the top edges and sew around the opening with a ¼-inch seam allowance. - Turn and Finish
Pull the bag through the gap left in the lining. Once everything is right side out, sew the gap closed. Push the lining into the outer bag and press the top edge neatly. For a professional finish, topstitch around the top edge.
Ideas for Personalization
One of the joys of sewing your own Water Bottle Bag Free Pattern is that you can make it completely your own. Whether you prefer a minimalist look or something bold and colorful, the possibilities are endless.
- Use Quilt Patterns – Create a small patchwork design for the outer fabric using leftover quilt blocks. This adds visual interest and a personal touch.
- Add Appliqué or Embroidery – Personalize the bag with your initials, favorite motifs, or even a small nature-themed design.
- Play with Straps – Instead of plain cotton webbing, consider braided rope, adjustable straps, or even a detachable option with clips.
If you enjoy making quilts, this project is an excellent opportunity to incorporate quilting skills into a small, functional item. You can even make matching quilted accessories to go with your water bottle bag for a cohesive look.
Tips for Beginners
If this is your first time working on a sewing project, don’t worry—this pattern is very forgiving. The straight seams and small size make it a great starting point. Here are a few tips to make the process even smoother.
- Measure Twice, Cut Once – This old sewing adage saves time and fabric. Use a quilt ruler for accuracy.
- Press as You Go – Pressing seams flat after each step keeps your project looking neat and professional.
- Take Your Time – Don’t rush through the steps; enjoy the process of watching your creation come together.
Remember, sewing is as much about creativity as it is about technique. There’s no “wrong” way to make your bag as long as it functions and makes you happy.
Why This Project Is Worth Trying
Making your own Water Bottle Bag Free Pattern is about more than just having a practical item—it’s about creativity, sustainability, and personal style. By using fabric scraps from past quilt projects, you reduce waste while creating something beautiful and functional.
It’s also a satisfying quick project. In just a few hours, you can go from raw materials to a ready-to-use bag. That instant gratification is perfect for boosting your sewing confidence, especially if you’re new to the craft.
Finally, a handmade bag makes a thoughtful gift. You can tailor the design to the recipient’s taste, making it even more special than anything you could buy in a store.
Share Your Creations!
Now that you’ve completed your Water Bottle Bag Free Pattern, it’s time to show it off! Post photos on your favorite crafting forum, share on social media, or bring it along on your next outing and enjoy the compliments. You never know—you might inspire someone else to pick up a sewing needle and try their own.
If you’ve incorporated a quilt pattern into your bag, be sure to highlight that detail. Many sewing enthusiasts love seeing creative uses for quilting techniques beyond traditional blankets.
So grab your fabric, thread, and sewing machine, and start your water bottle bag today. You’ll end up with something that’s both practical and beautiful—plus, you’ll have the satisfaction of knowing you made it yourself.