
If you love the idea of creating a quilted table runner that blends tradition with creativity, the Wild Goose Chase Table Runner is the perfect project for you. This classic quilting pattern has been around for generations, known for its bold geometric design and timeless charm. Whether you’re a seasoned quilter or a complete beginner, this tutorial will guide you step by step through the process of making your own stunning table runner.
In this tutorial, you’ll learn how to choose your fabrics, cut your pieces precisely, sew your blocks, and assemble everything beautifully. We’ll also share some fun customization ideas and finishing touches to make your table runner truly unique. Let’s dive into the creative flight of the Wild Goose Chase!
Understanding the Wild Goose Chase Quilt Pattern
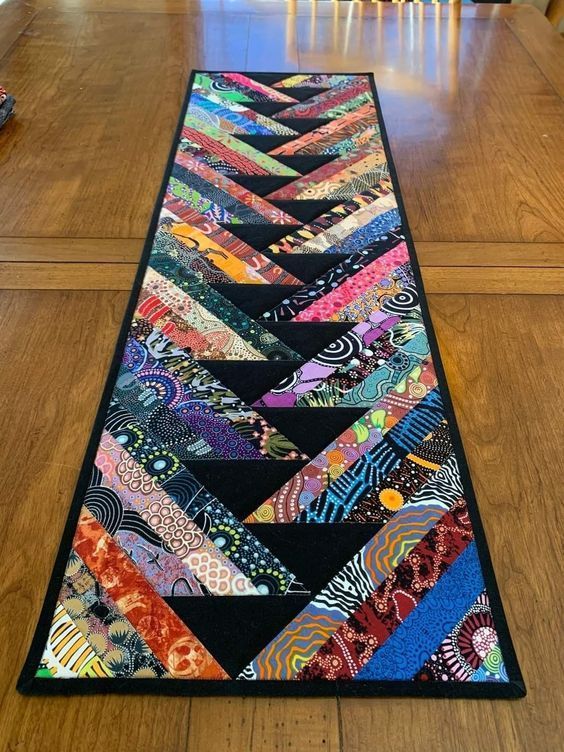
The Wild Goose Chase quilt pattern is one of the oldest and most beloved designs in traditional quilting. It’s characterized by a repeating “flying geese” motif—triangular shapes arranged in a way that suggests motion, like a flock of geese soaring across the sky. This pattern represents freedom, travel, and creativity—perfect symbolism for any home decor piece.
Although it looks intricate, the Wild Goose Chase is surprisingly approachable. The design is made up of simple triangle units that repeat across your table runner, creating a visually striking geometric layout. With just a few colors and precise cutting, you can achieve a professional and elegant look.
One of the best things about this pattern is its versatility. You can use it for a table runner, a quilt block, a pillow cover, or even a full-size quilt. In this guide, we’ll focus on a table runner version—small enough to finish quickly but still large enough to showcase your quilting skills.
Materials You’ll Need
Before you begin, gather your materials. Having everything prepared will make your quilting process smooth and enjoyable. Here’s what you’ll need for your Wild Goose Chase Table Runner:
- Fabric A (background): ½ yard of light-colored cotton (white, cream, or pale gray)
- Fabric B (geese): ¼ yard of a bold contrast color (navy, red, or teal)
- Fabric C (accents): ¼ yard of a coordinating print or solid color
- Backing fabric: ½ yard
- Batting: ½ yard
- Thread: Matching or neutral color
- Cutting tools: Rotary cutter, cutting mat, and quilting ruler
- Sewing machine (with a ¼-inch foot, if possible)
- Iron and ironing board
If you’re new to quilting, stick with high-quality cotton fabrics—they are easier to cut, press, and sew. And don’t forget a sharp rotary blade for precise edges; this makes all the difference in aligning your flying geese blocks later.
Cutting the Fabric
Accurate cutting is key to a clean, polished quilting pattern. Start by pressing all your fabrics to remove any wrinkles, then lay them flat on your cutting mat. Using your quilting ruler and rotary cutter, cut the following pieces:
- From Fabric A (background):
- (12) 3½-inch squares
- (24) 2-inch x 3½-inch rectangles
- From Fabric B (geese):
- (24) 2-inch x 3½-inch rectangles
- From Fabric C (accents):
- (6) 3½-inch squares (for center blocks or border details)
Keep your pieces organized in separate piles. Labeling them with sticky notes or small bags can help, especially if you’re working on the project over several days.
Remember, the Wild Goose Chase design depends on symmetry and alignment. Taking time during cutting ensures your geese “fly” straight when you assemble the pattern later!
Sewing the Flying Geese Units
Now comes the fun part—sewing your flying geese units! This is the foundation of the Wild Goose Chase quilt pattern. Follow these steps carefully:
- Take one background square (3½-inch) and place a smaller geese rectangle (2 x 3½ inches) right sides together. Align one short edge and draw a diagonal line from corner to corner on the back of the rectangle.
- Stitch along the drawn line, then trim ¼ inch away from your seam line. Press the triangle open.
- Repeat this process on the opposite side of the square to form a “goose” shape.
Each unit should measure 3½ x 6½ inches when finished. Continue making these until you have 12 complete flying geese blocks.
As you sew, keep a consistent ¼-inch seam allowance and press carefully after each step. This ensures your pieces align perfectly during assembly. Don’t rush—quilting is meant to be relaxing and rewarding, not stressful!
Assembling the Table Runner
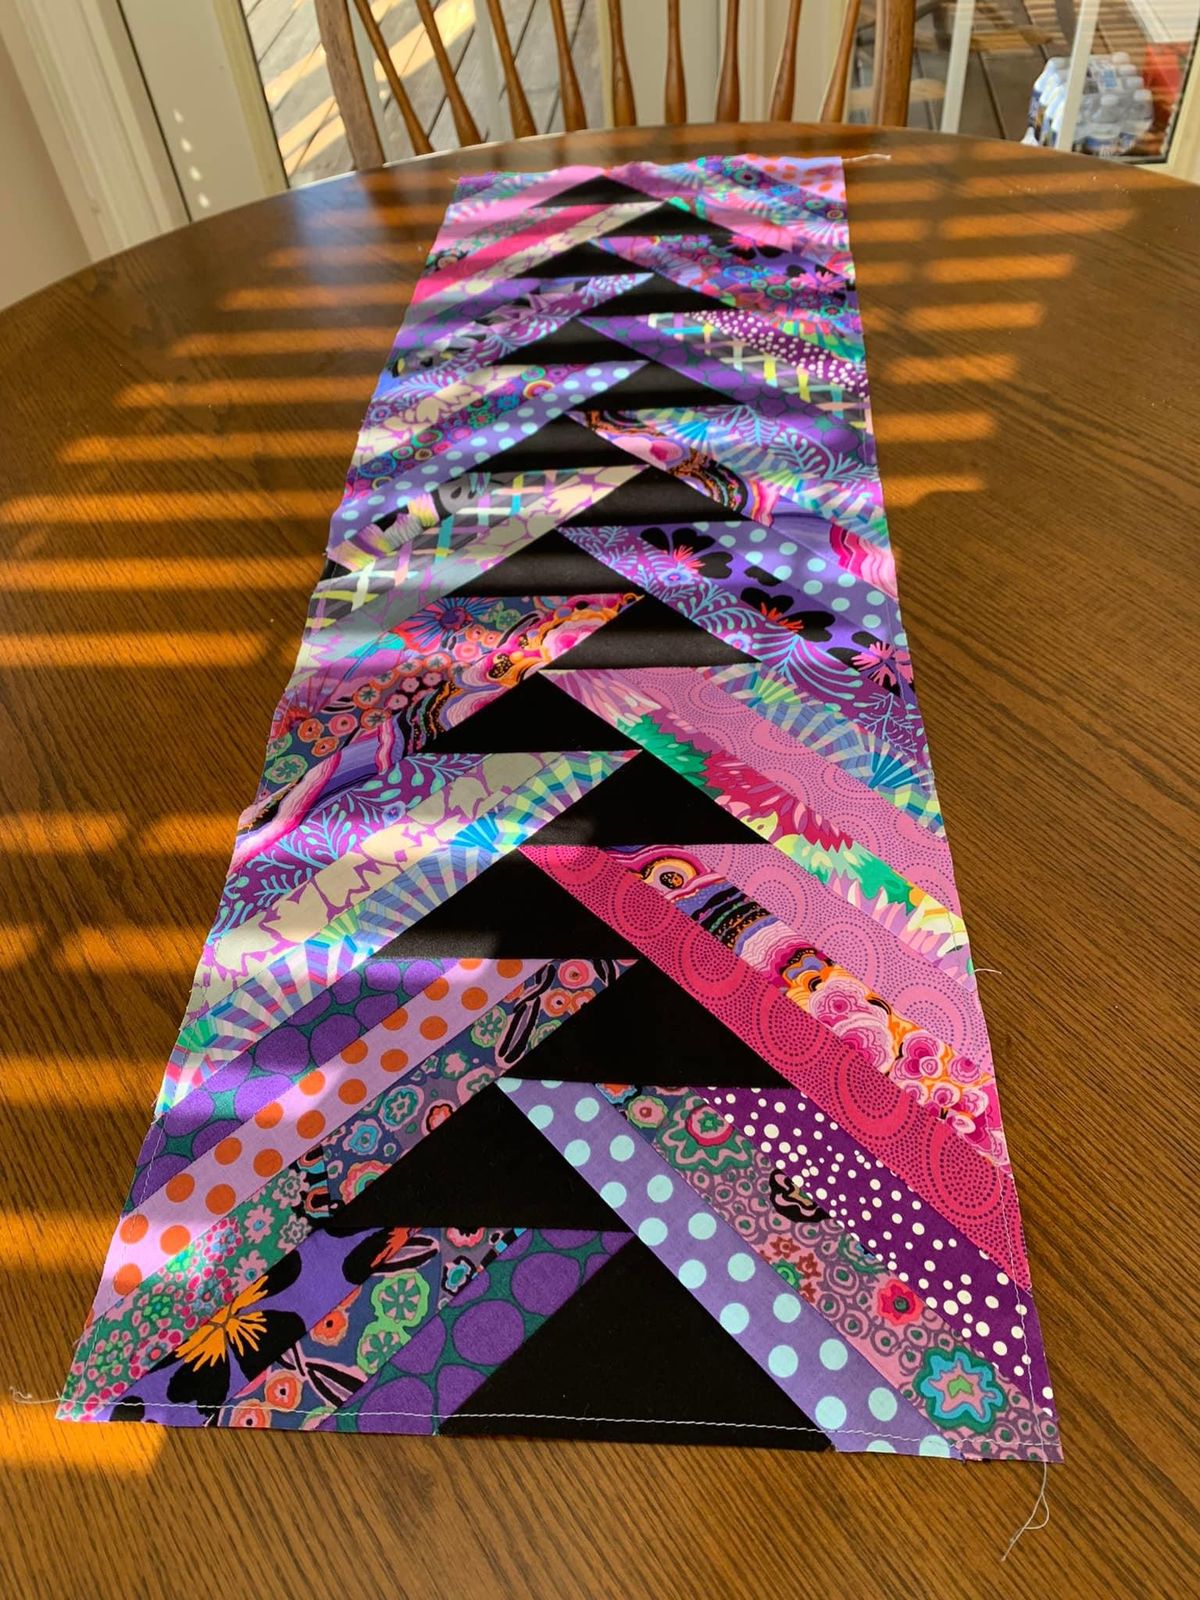
Once your flying geese units are ready, it’s time to assemble the table runner top. Lay out your pieces on a flat surface or design wall to visualize the layout. You’ll want to alternate the direction of the geese for a dynamic look.
Arrange your blocks in three rows of four flying geese units each. Between each row, you can add accent squares from Fabric C for visual interest. Once you’re happy with your layout, begin sewing the rows together. Press seams open or to one side, whichever you prefer.
Finally, sew all the rows together to form the table runner top. It should measure approximately 12 x 36 inches, depending on your seam accuracy. Give it a final press, and admire your work—you’re nearly done with your Wild Goose Chase adventure!
Adding the Backing and Quilting
Now that your quilt top is assembled, it’s time to layer, quilt, and bind. This step turns your fabric into a finished quilted table runner that’s ready to decorate your dining space.
Start by laying your backing fabric right side down, then place the batting on top, followed by your quilt top (right side up). Smooth out any wrinkles and secure the layers using quilting pins or basting spray.
When it comes to quilting, you can keep it simple with straight-line stitching or try diagonal lines that follow the direction of your flying geese. This enhances the feeling of movement in the design. Once quilting is done, trim the edges and bind your table runner using your favorite method—either machine or hand binding.
Personalization Ideas and Variations
One of the best things about quilting is the opportunity to make each project your own. The Wild Goose Chase quilting pattern lends itself beautifully to customization. Here are a few creative ideas:
- Seasonal Colors: Use fall tones (orange, brown, and gold) for an autumn centerpiece, or icy blues and silvers for winter decor.
- Scrappy Style: Mix different fabric prints for each goose—perfect for using up fabric leftovers or charm squares.
- Mini Quilts: Turn individual Wild Goose Chase blocks into coasters or placemats to match your table runner.
You can also play with layout—try offsetting the rows or rotating some of the flying geese for a modern twist. No matter how you personalize it, the result will be uniquely yours.
Final Touches and Display Tips
Once your table runner quilt is complete, give it a good press and admire your handiwork! The clean lines and motion-filled pattern make it a stunning piece for any dining table, console, or coffee table. You can also hang it as wall art if you prefer.
For a cozy touch, pair it with matching fabric napkins or quilted coasters. If you’re gifting it, wrap it with a ribbon and include a little tag that reads “Handmade with Love.” Handmade gifts always carry extra meaning, especially when they’re stitched with care.
Lastly, remember that quilting isn’t about perfection—it’s about joy and creativity. Each project teaches you something new, and the Wild Goose Chase is a wonderful way to strengthen your skills while creating something beautiful for your home.
Share Your Wild Goose Chase Creation!
Congratulations—you’ve completed your Wild Goose Chase Table Runner! Now it’s time to share your creation with the world. Take a few photos in good lighting and post them on social media using hashtags like #WildGooseChaseQuilt and #QuiltingPattern.
Sharing your progress not only inspires others but also connects you to a community of creative quilters. Whether you’re posting in Facebook quilt groups, Instagram, or Pinterest boards, your project can encourage someone else to start their own quilting journey.
So, spread your wings, celebrate your creativity, and enjoy your beautiful handmade table runner. The Wild Goose Chase may be an old pattern, but in your hands, it becomes a timeless piece of modern artistry.