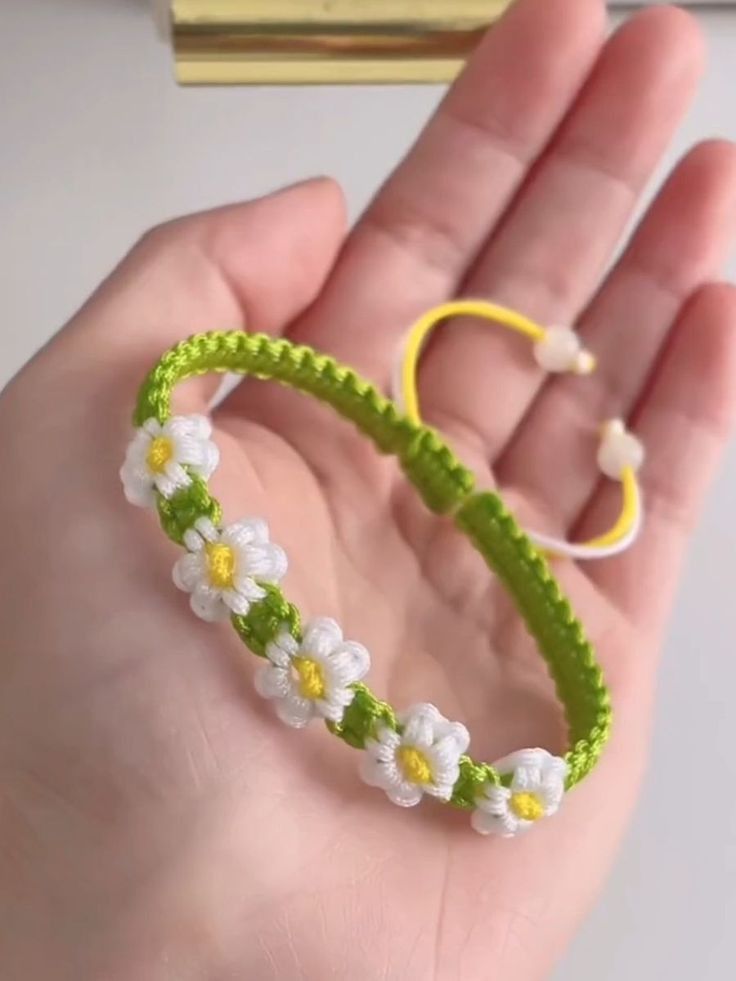
Creating a delicate macramé flower bracelet is a beautiful and relaxing project, perfect for beginners and experienced crafters alike. This design combines simple knotting techniques with small floral details, resulting in a charming handmade accessory that can be customized in many colors.
In this complete guide, you’ll learn the materials needed, basic techniques, and a detailed step-by-step process to create your own macramé flower bracelet.
Materials Needed
Before starting, gather all your supplies to make the process smooth and enjoyable:
- Waxed polyester cord or nylon cord (1 mm thickness recommended)
- Two colors of cord (example: brown for base, pink for flowers)
- Scissors
- Tape or clipboard (to hold your work in place)
- Lighter (optional, to seal cord ends)
- Small beads (optional, for decoration or closure)
Understanding the Basic Knots
This bracelet mainly uses simple macramé knots:
- Square Knot (Flat Knot): The foundation of most macramé projects
- Half Knot: Used to create slight twists or texture
- Overhand Knot: Useful for finishing and closures
If you’re new, don’t worry—once you repeat these knots a few times, your hands will quickly get used to the rhythm.
Step 1: Prepare the Base Cords
Cut your cords as follows:
- 2 base cords (about 40–50 cm each)
- 1 working cord (about 100–120 cm)
- 1 flower cord (about 80–100 cm, in a different color)
Fold the base cords in half and secure them to your workspace using tape or a clipboard. These cords will form the structure of your bracelet.
Step 2: Create the Adjustable Closure
Start by making a sliding knot closure:
- Cross the ends of the base cords.
- Use a separate short cord to wrap around both sides.
- Tie several square knots around them (about 6–8 knots).
- Tighten and trim the ends.
This allows the bracelet to adjust easily to different wrist sizes.
Step 3: Begin the Bracelet Base
Using your main working cord:
- Position it under the base cords.
- Start tying square knots around the base cords.
- Continue for about 1–2 cm to create a solid foundation.
Keep your tension consistent so the bracelet looks neat and even.
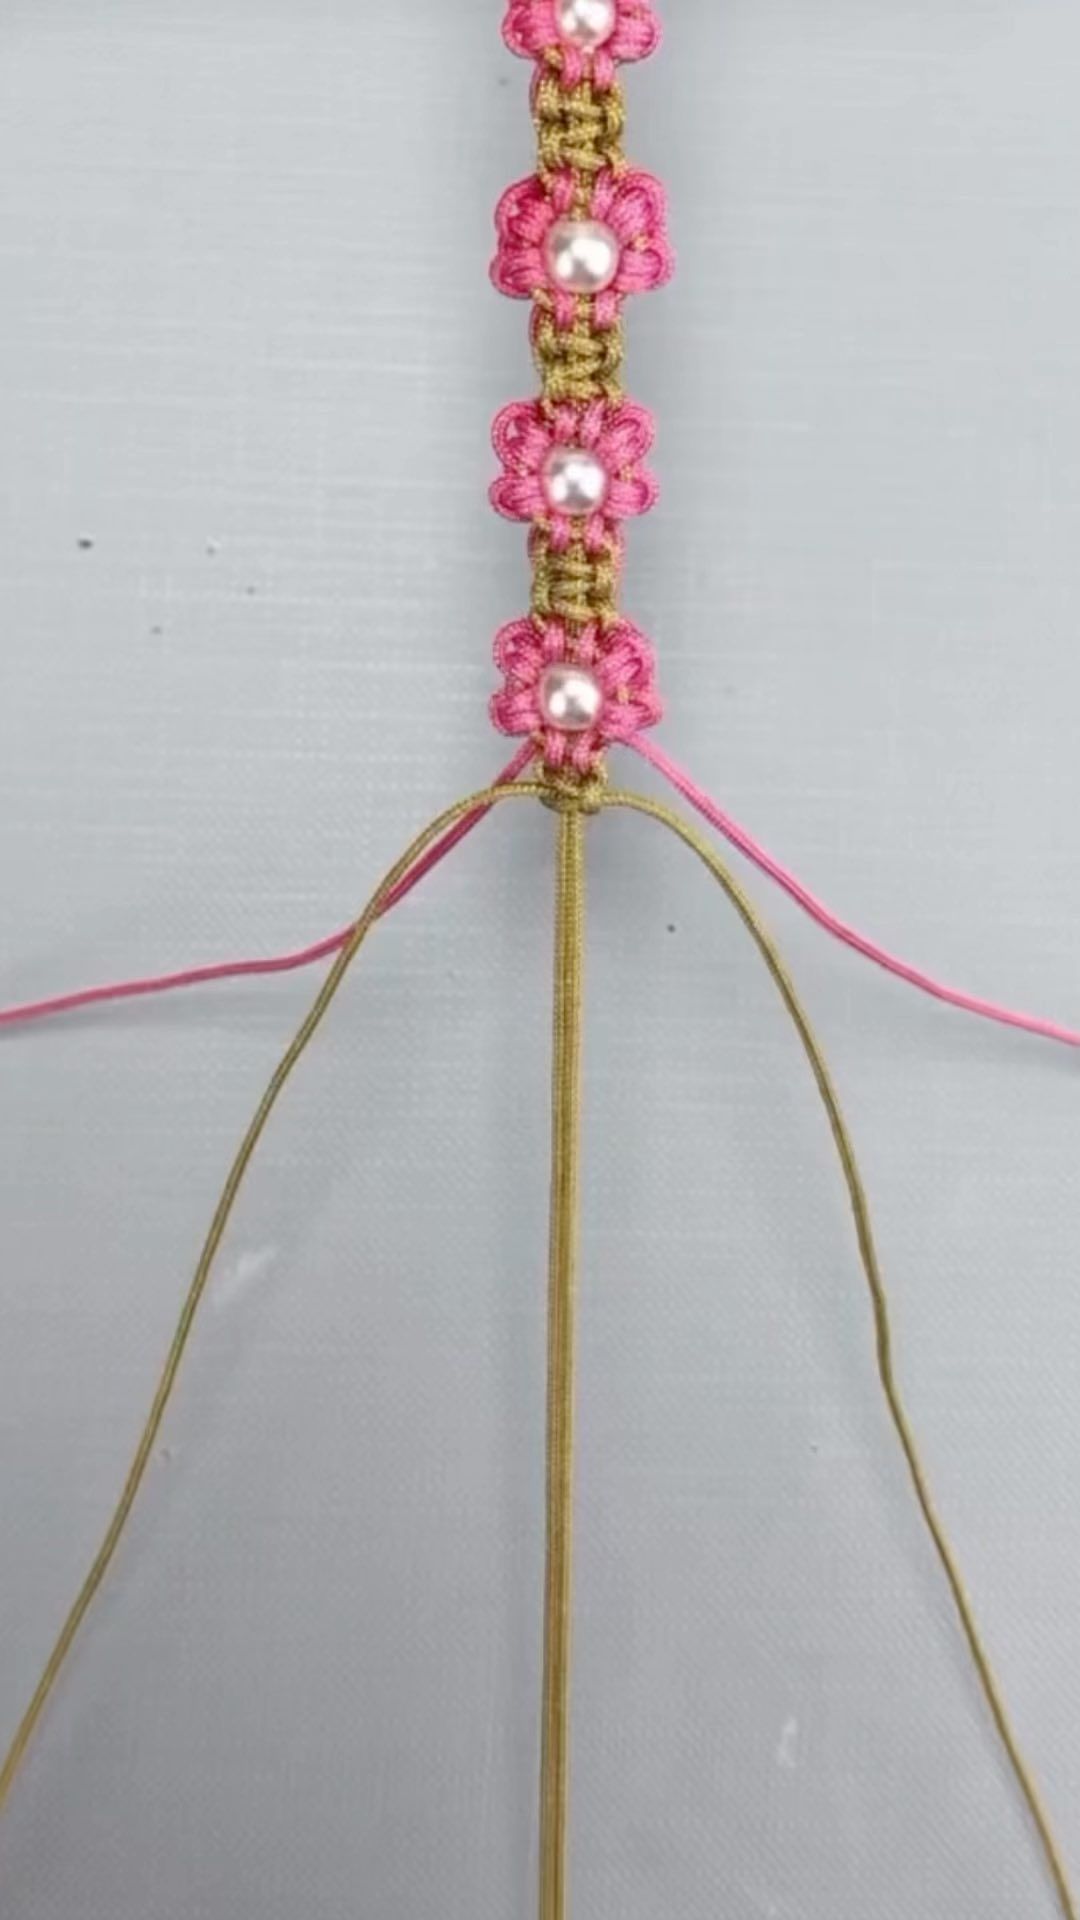
Step 4: Form the First Flower
Now comes the decorative part:
- Take the flower-colored cord.
- Tie small loops using half knots to form petal shapes.
- Create 4–5 loops around the base cords, spacing them evenly.
- Gently tighten to form a flower shape.
You can adjust the size of the petals by pulling the loops tighter or leaving them slightly loose.
Step 5: Secure the Flower
After forming the flower:
- Use the base working cord again.
- Tie 2–3 square knots to lock the flower in place.
- Make sure everything is centered and secure.
This step prevents the flower from shifting when worn.
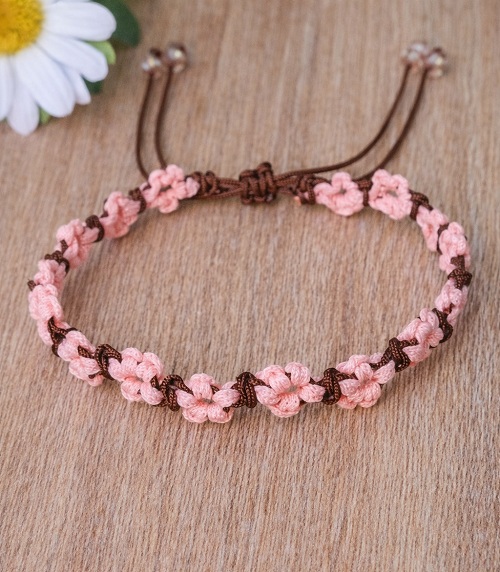
Step 6: Repeat the Pattern
Continue alternating:
- A few square knots (about 1 cm)
- One flower
Repeat this pattern until the bracelet reaches your desired length. Typically, 6–10 flowers create a balanced look.
Step 7: Finish the Bracelet
Once you reach the correct length:
- Tie several square knots at the end.
- Secure with a tight overhand knot.
- Trim excess cord.
- Carefully melt the ends with a lighter (optional) to prevent fraying.
Step 8: Final Adjustments
Slide the closure to test the fit. Adjust if necessary by tightening or loosening the sliding knot.
You can also add small beads at the ends for an extra decorative touch.
Customization Ideas
Make your bracelet unique with these ideas:
- Use pastel colors for a soft, romantic style
- Try bright colors for a summer look
- Add metallic beads for elegance
- Mix multiple flower colors for a playful design
Tips for Best Results
- Keep your knots even and consistent
- Don’t pull too tightly on flower loops
- Practice one flower before starting the full bracelet
- Work slowly—precision matters more than speed
Conclusion
This macramé flower bracelet is a perfect handmade accessory that combines simplicity with beauty. Once you master the pattern, you can easily create variations and even make matching sets for gifts or to sell.
With just a few cords and basic knots, you can turn simple materials into something truly special. Now it’s your turn—start knotting and bring your own floral bracelet to life!