
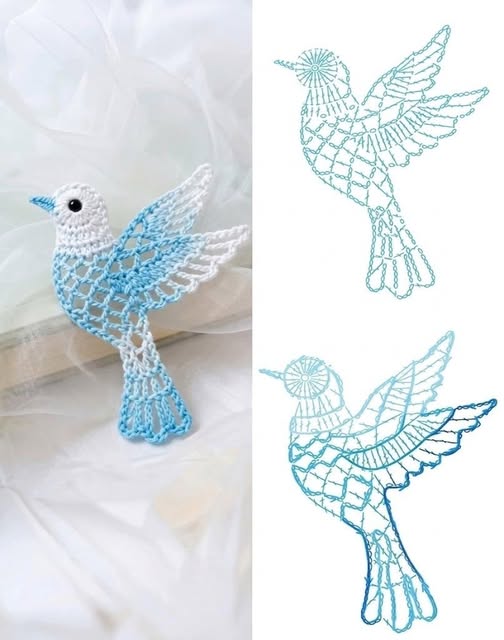
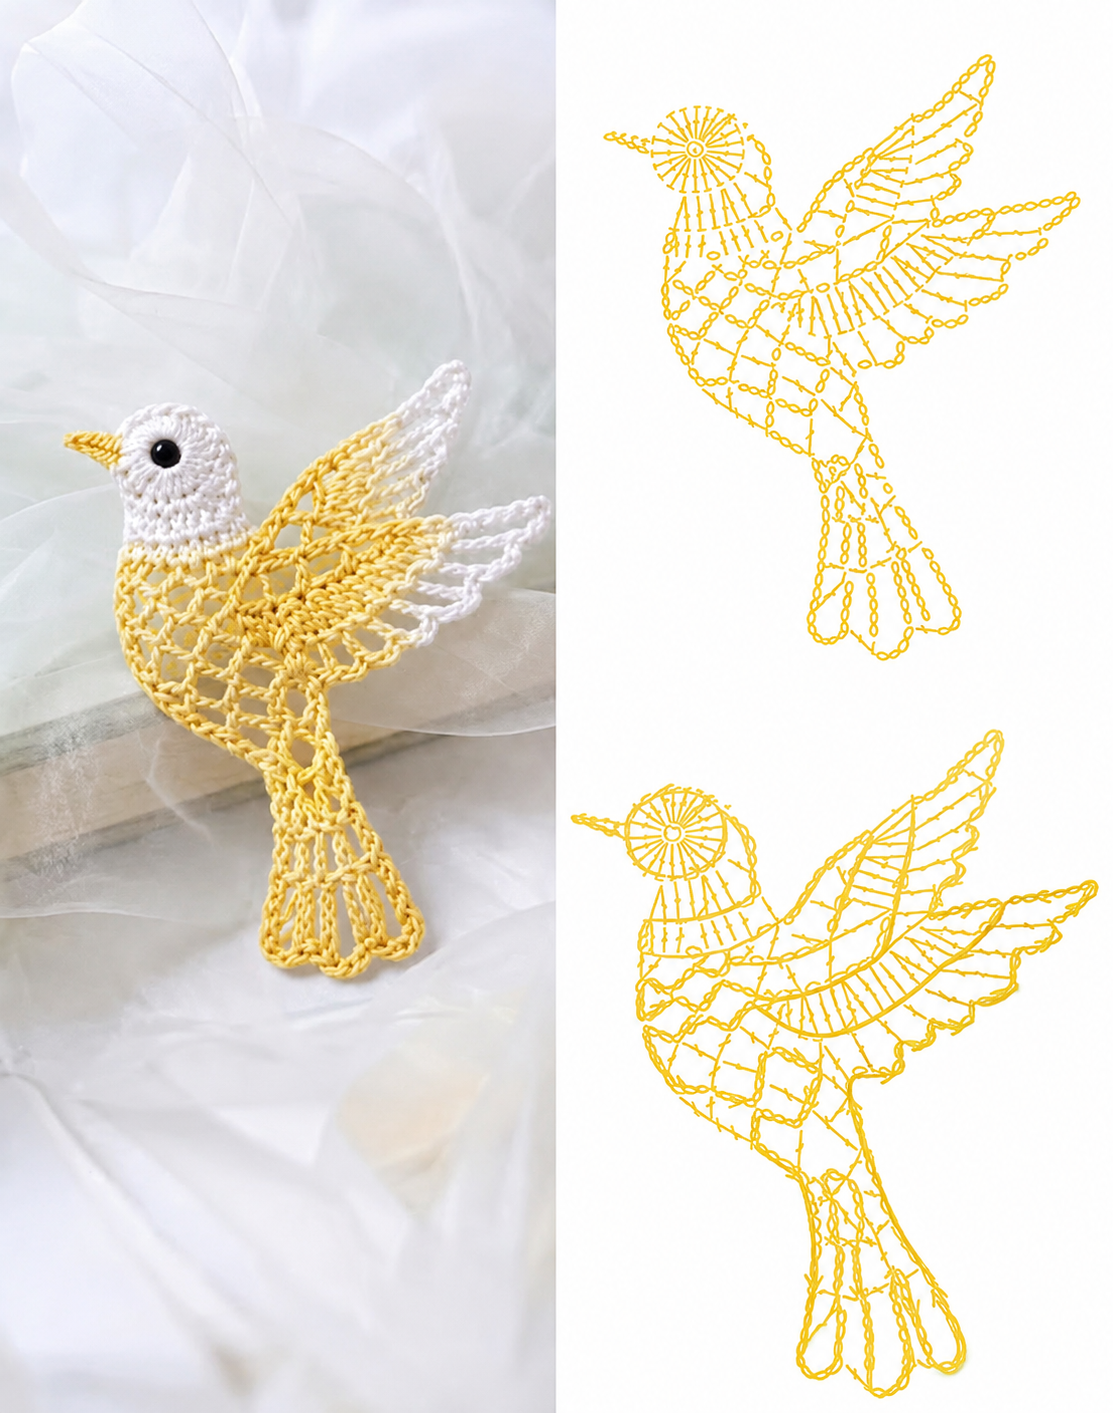
The Crochet Hummingbird Applique is a delicate and elegant project that adds beauty to blankets, bags, pillows, wall décor, clothing, and handmade gifts. This lightweight lace-style bird design combines simple crochet stitches with openwork details, creating a graceful hummingbird effect that looks beautiful in any color combination.
This pattern is beginner-friendly for crocheters who already know basic stitches and would also be enjoyable for intermediate makers who love decorative appliques.
Materials Needed
- Crochet cotton thread size 10 or lightweight yarn
- Crochet hook 1.75 mm – 2.5 mm
- Small scissors
- Yarn needle
- Stitch markers (optional)
- Black pearl bead or safety eye (optional)
- Fabric glue (optional for attaching)
- Blocking pins and spray starch (optional)
Recommended Colors
- White and yellow
- White and blue
- Pink and white
- Lavender and cream
- Green and yellow
Crochet Abbreviations
- ch = chain
- sl st = slip stitch
- sc = single crochet
- hdc = half double crochet
- dc = double crochet
- tr = treble crochet
- st = stitch
- sp = space
Finished Size
Approximately:
- 5 to 7 inches tall depending on yarn and hook size
Step 1 – Crochet the Head
Start with white thread.
- Make a magic ring.
- Crochet 12 dc into the ring.
- Pull tight and join with sl st.
- Ch 2 and crochet another round of dc evenly around.
- Fasten off leaving a small tail.
Optional:
Sew a small black bead for the eye.
Step 2 – Make the Beak
- Attach yellow thread near the front of the head.
- Ch 6.
- Sl st back through each chain.
- Fasten off.
The beak should appear long and delicate like a hummingbird.
Step 3 – Crochet the Body
Using yellow thread:
- Attach yarn at the lower side of the head.
- Ch 5 for turning.
- Create rows of dc and chain spaces:
- dc, ch 2, skip 2 sts
- repeat to form mesh lace
- Continue decreasing slightly toward the tail.
- Shape the body into a soft curved form.
This open lace effect gives the applique a lightweight decorative appearance.
Step 4 – Create the Wings
First Wing
- Attach yarn at the upper body.
- Ch 10.
- Work:
- 2 dc
- 2 tr
- picot edge with chains
- Return with sl st.
Second Wing
Repeat the same process slightly underneath the first wing.
The layered wings create movement and realism.
Step 5 – Crochet the Tail
- Attach yarn at the bottom of the body.
- Ch 12.
- Work back with dc stitches.
- Repeat 3 to 4 tail feathers.
- Join all feathers together at the base.
The tail should look narrow and elegant.
Step 6 – Add Decorative Edging
Using white thread:
- Crochet small picot edges around the wings and tail.
- Add sl st borders for definition.
- Hide all loose yarn ends carefully.
Step 7 – Blocking the Applique
For a professional finish:
- Lightly spray with water or starch.
- Pin the hummingbird into shape.
- Allow it to dry completely.
Blocking helps open the lace stitches and keeps the wings beautifully shaped.
Creative Uses for the Crochet Hummingbird
You can use this applique for:
- Baby blankets
- Cushion covers
- Tote bags
- Bookmark decorations
- Wall art
- Scrapbooking
- Gift wrapping embellishments
- Table runners
- Curtain decorations
Tips for Best Results
- Use mercerized cotton for crisp lace details.
- Keep tension loose for open mesh stitches.
- Block the wings carefully for symmetry.
- Metallic thread can create a sparkling decorative effect.
- Experiment with gradient yarn colors for a realistic bird appearance.
Conclusion
This Crochet Hummingbird Applique Pattern is a charming project filled with delicate details and artistic texture. Whether you make it for home décor, gifts, or accessories, this elegant lace hummingbird adds a handmade touch that feels light, graceful, and timeless.
With simple stitches and creative shaping, you can customize the applique in endless color combinations and turn it into a truly unique crochet masterpiece.
PATTERN HERE
CROCHET PATTERNS
FULL PATTERN ACCESS
You will be redirected to another site
PATTERN HERE
Crochet – Tutorial
FULL PATTERN ACCESS
You will be redirected to another site